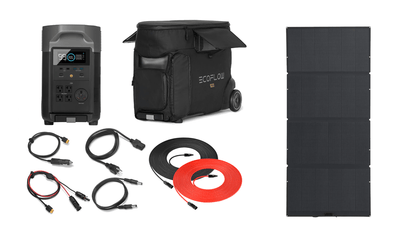
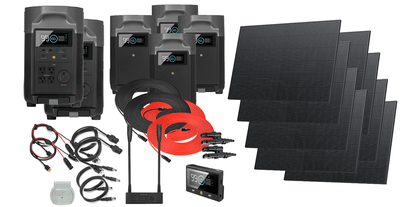
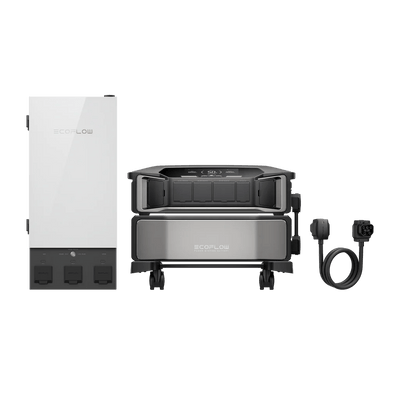
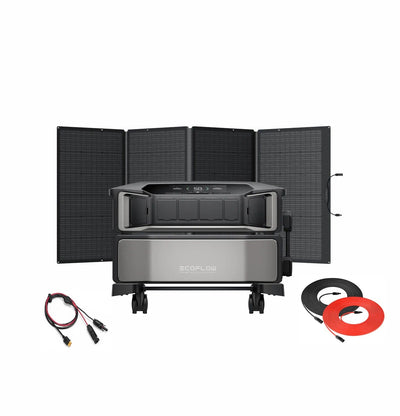
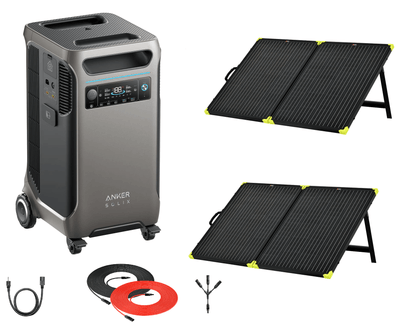
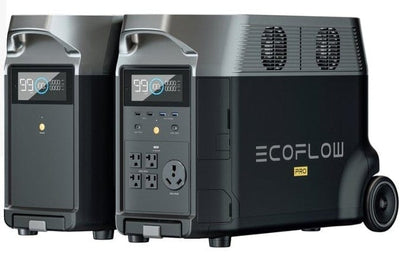
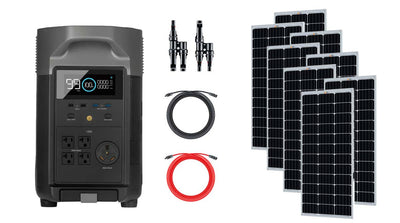
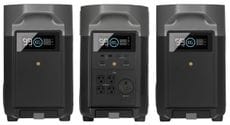
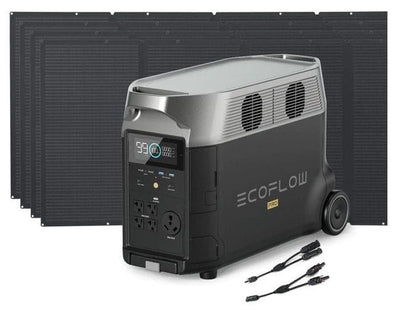
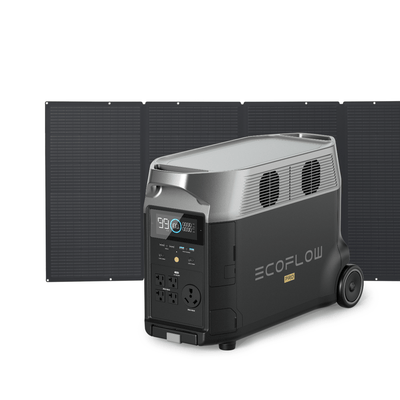
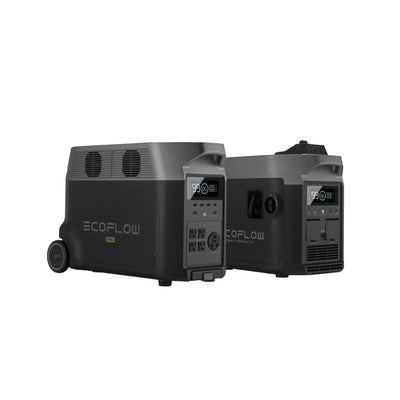
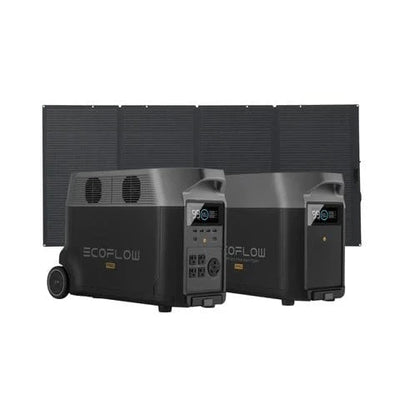
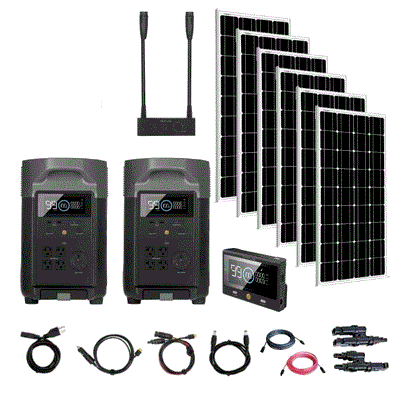
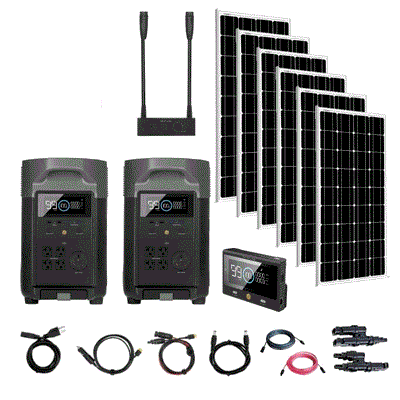
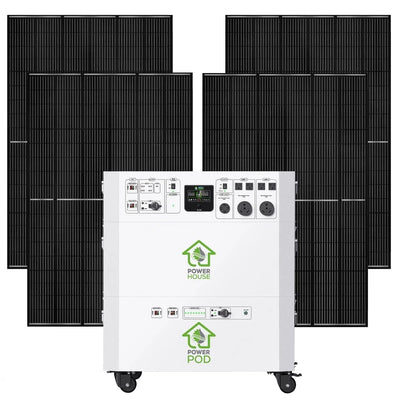
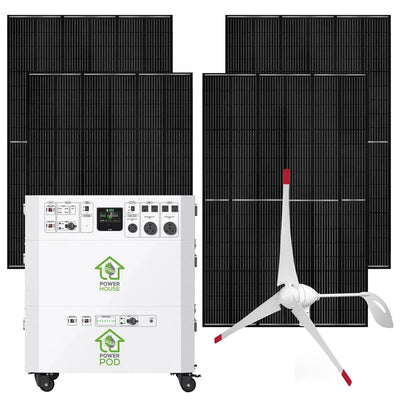
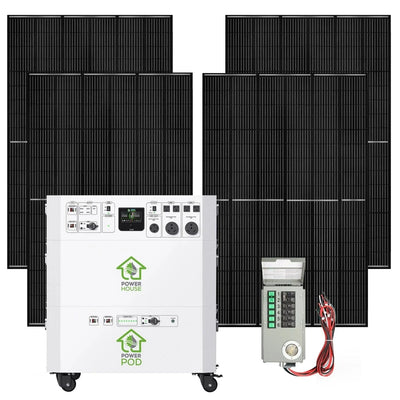
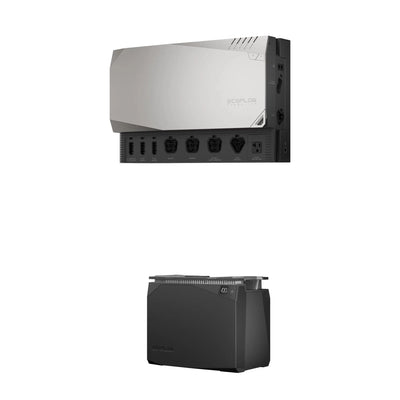
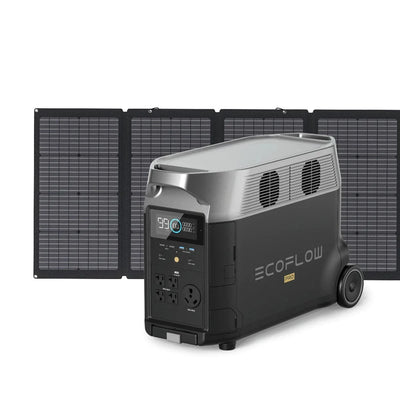
EcoFlow DELTA Pro Ultra is a residential power backup system designed for both extended outages and daily use. With an unrivaled capacity of 6kWh, 7.2kW output, and 5.6kW solar input, a single unit can run your entire home. With EcoFlow Smart Home Panel 2, get an uninterrupted power backup experience with automatic switch-over, energy consumption monitoring, and lower electricity bills.
Ecoflow Delta Pro Ultra - User Guide
The DELTA Pro Ultra can either be used as a stand-alone unit using various recharging options (low/high voltage solar systems, generators, EV chargers, etc.) or forms a whole home backup system to ensure that your home can be powered 24/7 without any influence from power outage.
With EcoFlow DELTA Pro Ultra's UPS technology, you'll get impeccable, uninterrupted power flow, EcoFlow DELTA Pro Ultra safeguards your vulnerable electronic equipment round-the-clock. For extended outages, you don't want to hear your backup in the background, so for low draws under 2000W, it's completely silent. With a whisper-quiet 0 dB, your nights remain undisturbed as it powers your devices.
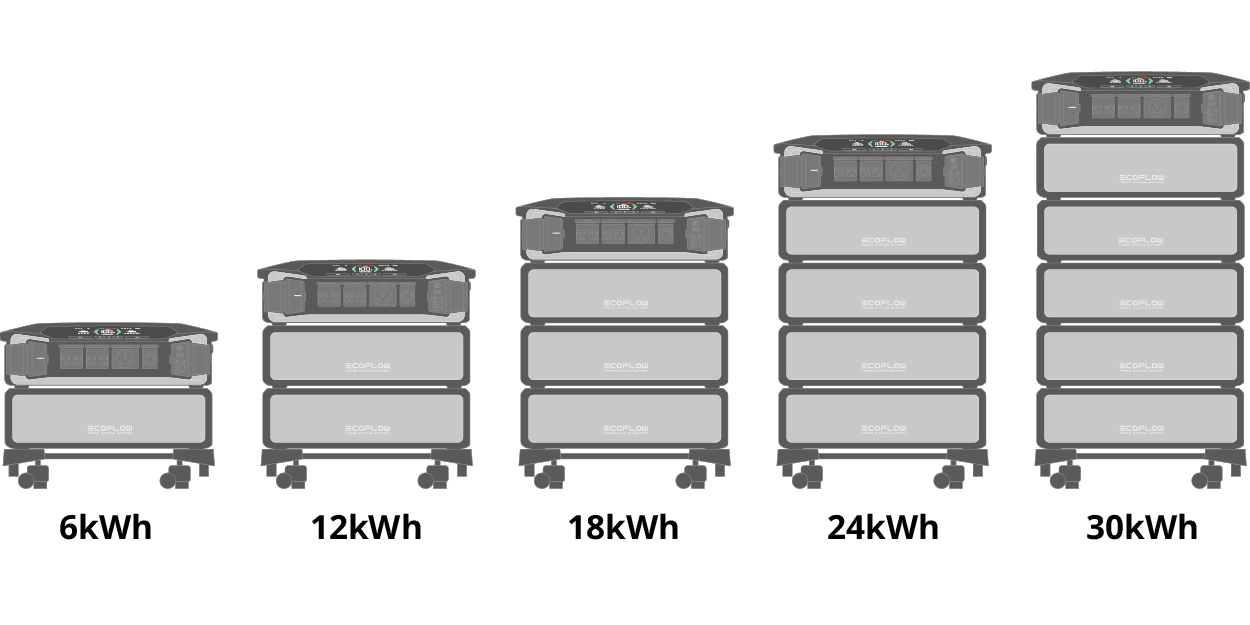
The rated capacity of one battery is 6kWh. To expand capacity for powering your appliances (see Overview or Power Your Appliances) or backing up your whole home (see Backup System), one can connect up to 5 batteries to an inverter or up to 15 batteries to 3 sets of inverters, which makes the total capacity add up to about 30kWh to 90kWh.
EcoFlow DELTA Pro Ultra Inverter
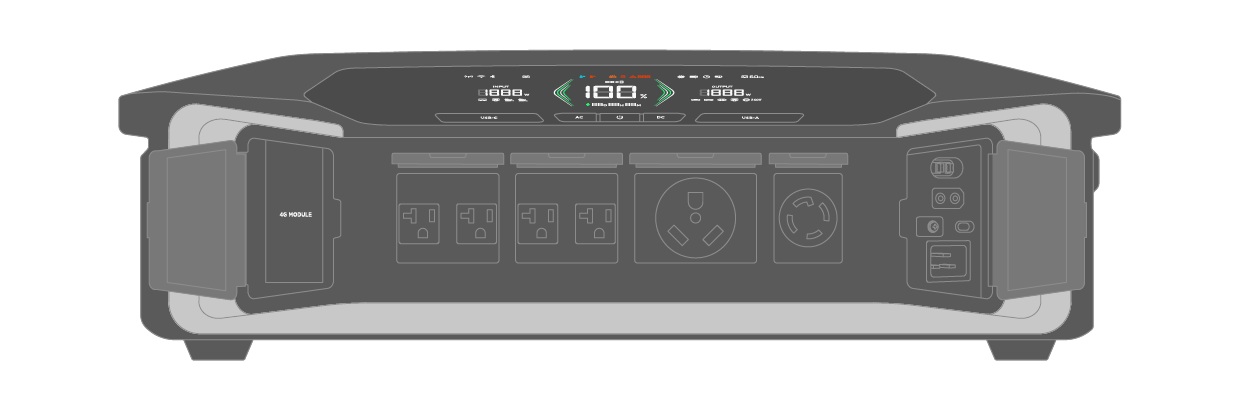
| General | |
|---|---|
| Model | EFYJ751-PCS-US |
| Net Weight | 31.7 kg (70 lb) |
| Dimensions | 690 × 481 × 214 mm (27.2 × 18.9 × 8.4 in.) |
| Wi-Fi | Frequency range: 2,412-2,462MHz/2,422-2,452MHz Maximum output power: 0.3597W |
| Bluetooth | Frequency range: 2,402-2,480MHz Maximum output power: 0.0109W |
| Output | |
| AC Output | Discharging: Pure sine, 7,200W total, 120V/240V~ 60Hz Bypass: 100-120V~30A total, 50Hz/60Hz |
| USB Ports | USB-A (× 2): 5V⎓2.4A, 12W max per port, total 24W USB-C (× 2): 5/9/12/15/20V⎓5A, 100W max per port, total 200W |
| DC Output | 12.6V⎓30A, 378W max |
| Input | |
| AC Input | Charging: 100-120V~15A; 200-240V~12.5A, 50/60Hz Bypass: 100-120V~15A, 50/60Hz (duration < 3hrs when the current exceeds 12A) |
| Power Input/Output | 100-120~30A; 200-240V~30A, 50/60Hz |
| High-PV | 80-450V⎓15A max, 4,000W max |
| Low-PV | 30-150V⎓15A max, 1,600W max |
| Other | |
| Temperature | Discharging temp: −20°C to 45°C (−4°F to 113°F) Charging temp: −20°C to 45°C (−4°F to 113°F) Storage temp: −20°C to 45°C (−4°F to 113°F) (optimum: −20°C to 45°C(68°C to 86°F)) |
| Altitude | ≤3,000 m (9,842 ft.) |
| IP Rating | IP54 |
| Noise Level | <30 dB |
| UPS | Backup UPS <20 ms; online UPS 0 ms |
| Communication Method | CAN & Bluetooth & Wi-Fi & Ethernet & 4G |
EcoFlow DELTA Pro Ultra Battery
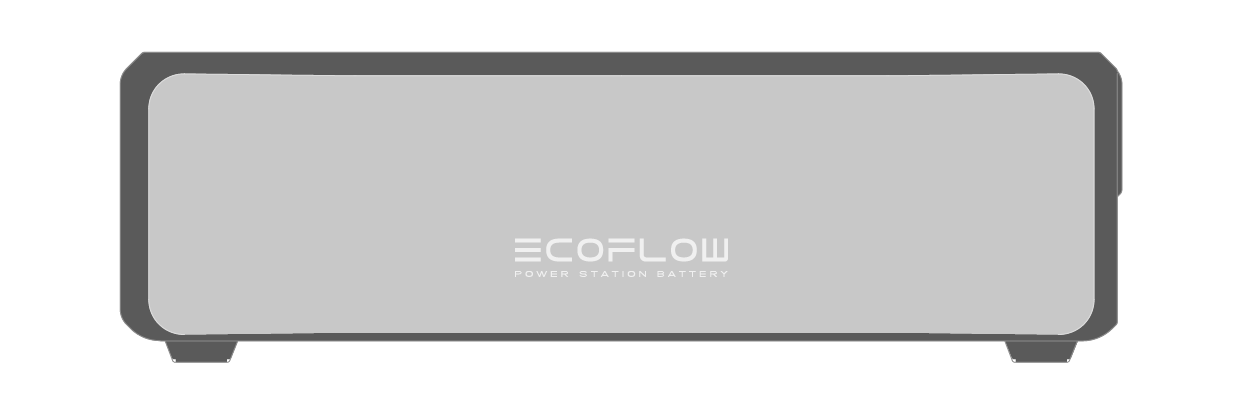
| General | |
|---|---|
| Model | EFYJ751-BP |
| Name | Rechargeable Li-ion battery pack |
| Net Weight | 52.7 kg (116.4 lb) |
| Dimensions | 660 × 455 × 204 mm (26 × 18 × 8 in.) |
| Capacity | 102.4V⎓60A, 6,144Wh |
| Battery | |
| Cell Material | LFP |
| Cycle Life | The battery maintains 80%+ SOH (state of health) after 3,500 cycles at 0.5C/0.5C at 25°C (77°F) |
| Protection type | Overvoltage protection, overload protection, overtemperature protection, short circuit protection, low temperature protection, low voltage protection, overcurrent protection |
| Other | |
| Temperature | Discharging temp: −20°C to 45°C (−4°F to 113°F) Charging temp: −20°C to 45°C (−4°F to 113°F) Storage temp: −20°C to 45°C (−4°F to 113°F) (optimum: −20°C to 45°C(68°C to 86°F)) |
| Altitude | ≤3,000 m (9,842 ft.) |
| IP Rating | IP54 |
NOTICE
- Specifications and notes herein may change without notification. EcoFlow reserves the right to modify the document due to product update.
- The IP rating is IP54 when the product is not in use.
- For most scenarios, noise level of the product is less than 30 dB.
- When the ambient temperature exceeds 40°C (104°F), the charging and discharging power are recommended to be equal to or less than 5,000W when charging and discharging the product at the same time.
- Whether the product can be charged or discharged depends on the actual temperature of the battery.
- The battery will automatically start self-heating if the temperature is lower than 0 °C (32 °F). To disable this, please set it in the app.
Appliance Compatibility
Refer to the information below to ensure that your appliances are compatible with DELTA Pro Ultra. If you choose to proceed with incompatible appliances, DELTA Pro Ultra may not be able to provide backup power effectively. To avoid this, please check the following specifications carefully.
Compressor-based Appliances
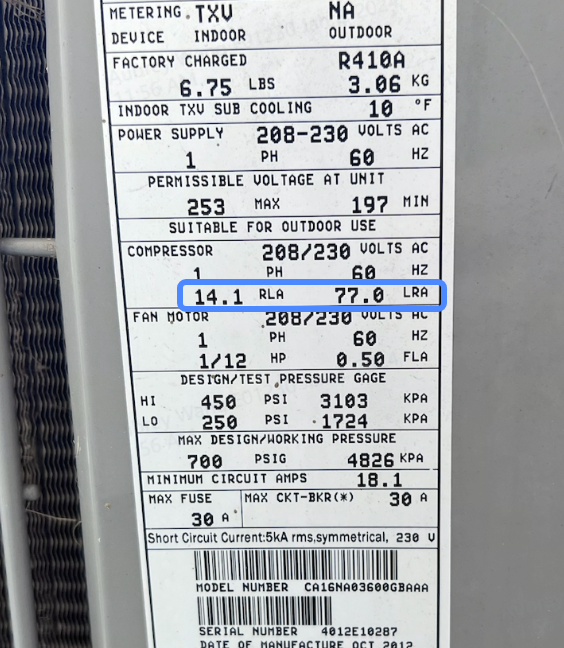
For any compressor-based appliance, please ensure that the RLA (Rated Load Amps) and LRA (Locked Rotor Amps) of your appliances are compatible with the corresponding specs of the inverter. Compressor-based appliances include air conditioners, heat pumps, fridges, etc.
| Max combined appliance rating per DELTA Pro Ultra | |
|---|---|
| ≤120A LRA or ≤20A RLA per DELTA Pro Ultra |
Resistive-based Appliances
Resistive-based appliances include tank water heaters, tankless water heaters, etc.
| Maximum combined rating | Compatibility |
|---|---|
| 7.2kW, 10.8kW peak | 1 set of DELTA Pro Ultra |
| 14.4kW, 21.6kW peak | 2 sets of DELTA Pro Ultra |
Introduction
The DELTA Pro Ultra can be used to create a whole home backup system that stores power for your appliances using several schemes. You can check daily/monthly/yearly figures or configure settings via the EcoFlow app. You will enjoy an outage-free life after installing this whole home backup system, which is specifically suitable for emergency backup during hurricane seasons, power outage, peak power demand, and so on.
CAUTION
- The installation should be performed by a licensed electrician. Improper installation may result in death or serious injury and property damage.
- This section is for reference purpose ONLY and does not constitute legal advice. Please consult the local licensed electrician for detail.
Connection Schemes
EcoFlow Smart Home Panel 2
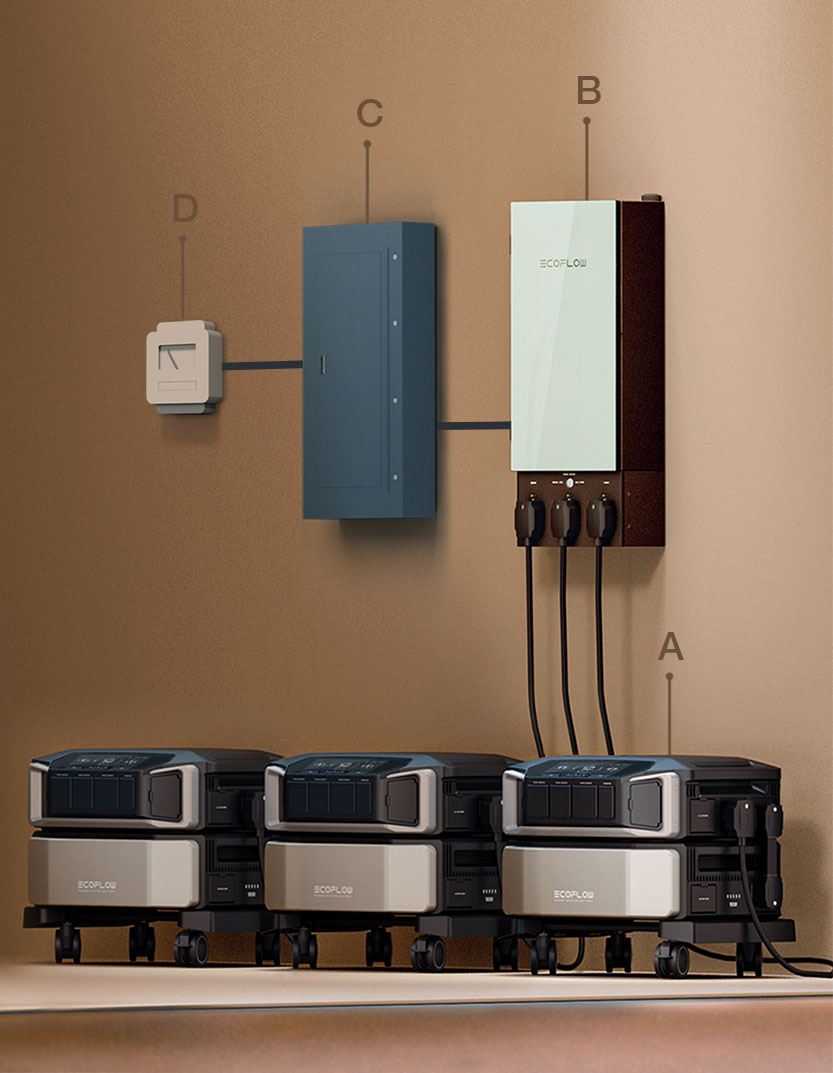
EcoFlow Smart Home Panel 2 connects up to 3 sets of DELTA Pro Ultra (1 inverter supports up to 5 batteries) and serves as an auxiliary distribution point for electricity from the main panel and provides extra breakers for your backup loads
- A. DELTA Pro Ultra (×3 sets max)
- B. EcoFlow Smart Home Panel 2 (sub panel)
- C. Main Panel
- D. Meter

Transfer Switch
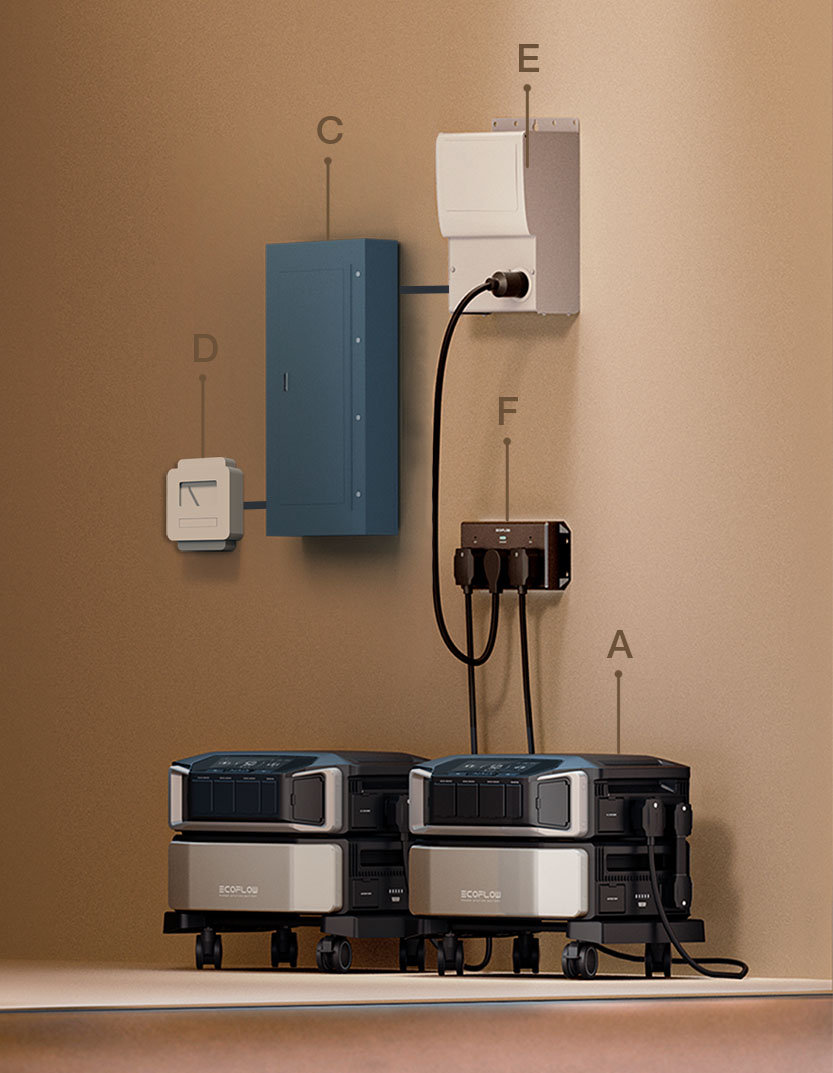
Scheme 1
The EcoFlow 50 amp hub links up to two sets of DELTA Pro Ultra and acts as a power transfer center between DELTA Pro Ultra and the 50 amp transfer switch.
- A. EcoFlow DELTA Pro Ultra (×2 sets max)
- C. Main Panel
- D. Meter
- E. 50 Amp Transfer Switch
- F. EcoFlow 50 Amp Hub
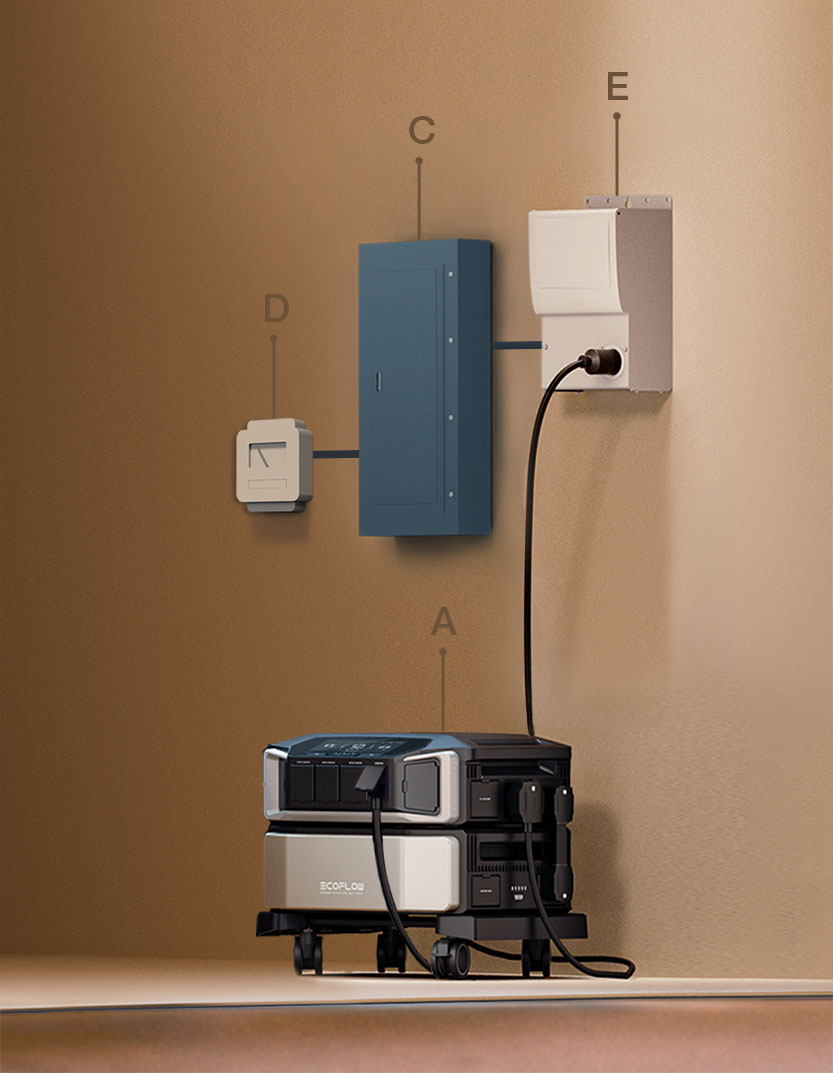
Scheme 2
-
A. EcoFlow DELTA Pro Ultra (×1 set)
-
C. Main Panel
-
D. Meter
-
E. 30 Amp Transfer Switch
NOTICE
- For any transfer switch that does not include inlet box function, please connect an inlet box to DELTA Pro Ultra and the transfer switch.
EcoFlow DELTA Pro Ultra Inverter
| 1 | USB-C output port (100W) | Supports USB-C powered appliances with maximum 100W output. |
|---|---|---|
| 2 | AC power button | ① Press once to enable or disable the corresponding AC ports. ② Press and hold for 10 seconds to switch the AC output frequency. |
| 3 | Main power button | ① Long press for 1 second to power on. ② Press & hold for 2-3 seconds to power off. ③ Press once to turn on/off the LCD screen. ④ Press and hold for 5 seconds to reset Bluetooth when the product is turned off. |
| 4 | DC power button | Press once to enable/disable the corresnponding DC ports. |
| 5 | USB-A output port | Supports USB-A powered appliances. |
| 6 | DC output port | Supports cig lighters and other appliances. |
| 7 | Low-PV input port | Connect the inverter to solar panels for charging, with the total voltage between 30V and 150V. |
| 8 | PV switch | Turns on/off the PV switch to enable/disable solar charging. |
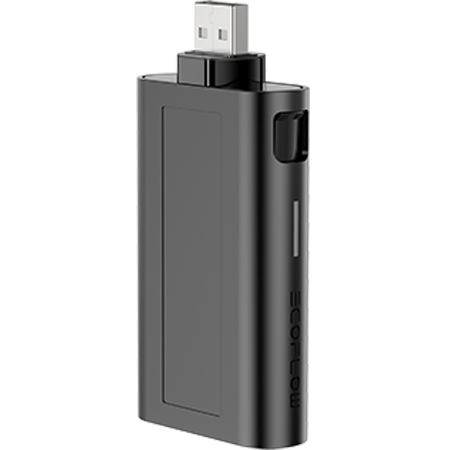
| 9 | 4G dongle port | Insert the EcoFlow 4G Dongle PPS (NA) into this port to establish communication between the device and EcoFlow web portal. |
| 10 | AC output socket (120V 20A max. per port) - Backup UPS | Supports 120V 20A max output and 20 ms UPS per port. |
| 11 | AC output socket (120V 20A max. per port) - Online UPS | Supports 120V 20A max output and 0 ms UPS per port. |
| 12 | AC output socket (120V 30A max.) - Online UPS | Supports 120V 30A max output and 0 ms UPS. |
| 13 | AC output socket (120V/240V 30A max.) - Backup UPS | Supports 120V/240V 30A max output and 20 ms UPS. |
| 14 | Ground screw | Grounds the product in case of potential electric shock. |
| 15 | AC charging input port | ① Connects the device to a wall outlet for charging. ② Connects the device to a generator for charging. |
| 16 | AC charging speed switch | Adjusts the recharging speed of AC charging. |
| 17 | High-PV input port | Connects to solar panels for recharging with the total voltage between 80V and 450V. |
| 18 | Lock hole | Locks the lock hole (lock is not included in the package) to prevent accidental startup. |
| 19 | Power input/output port | ① Connects to a generator for charging. ② Connects to an EV charger for charging. |
| 20 | Battery port | Connects the inverter to the battery. |

EcoFlow DELTA Pro Ultra Battery
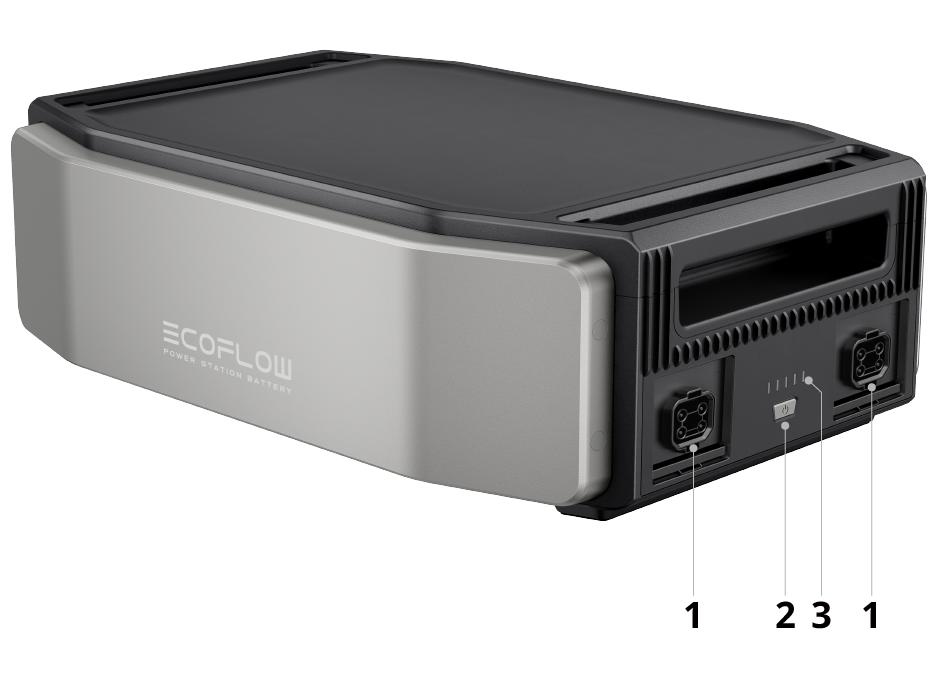
| 1 | Battery port | Connects the inverter to the battery. |
|---|---|---|
| 2 | Main power button | ① Long press for 1 second to power on. ② Press & hold for 2-3 seconds to power off. ③ Press once to turn on/off the LCD screen. ④ Press and hold for 5 seconds to reset Bluetooth when the device is turned off. |
| 3 | LED indicator | Displays status of power-on/off, and charging/discharging. |

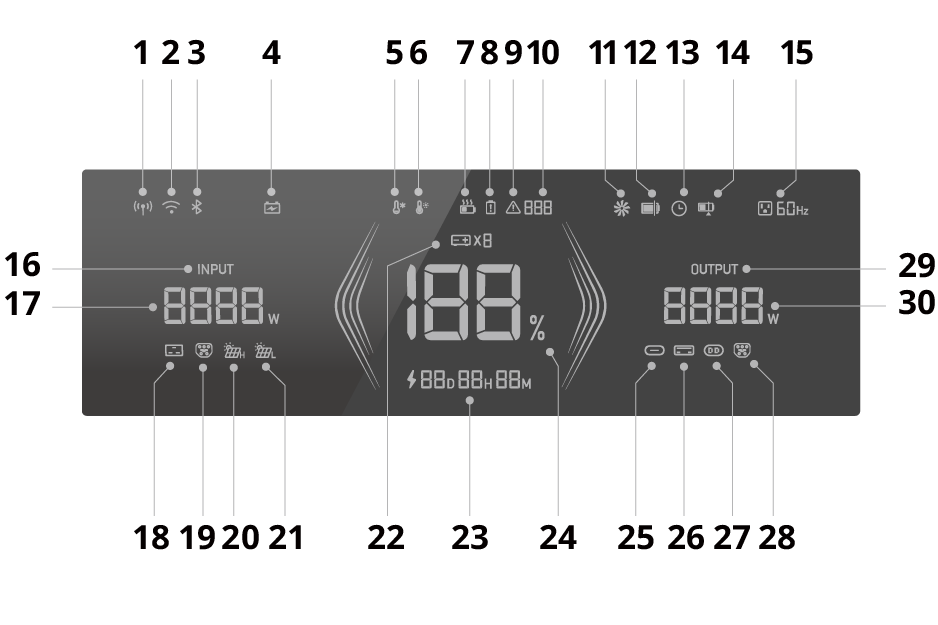
| 1 | 4G connection | 16 | Input indicator |
|---|---|---|---|
| 2 | Wi-Fi connection | 17 | Total input power |
| 3 | Bluetooth Connection | 18 | AC charging input |
| 4 | Backup mode | 19 | Power input |
| 5 | Low-temp warning | 20 | How-temp warning |
| 6 | High-temp warning | 21 | Low-temp warning |
| 7 | Self-consumption mode | 22 | Number of batteries |
| 8 | Battery failure warning | 23 | Remaining charging/discharging time |
| 9 | Error report | 24 | Remaining battery percentage |
| 10 | Error code | 25 | USB-C output |
| 11 | Ventilation fan | 26 | USB-A output |
| 12 | Charging limit | 27 | DC output |
| 13 | Timer | 28 | Power output |
| 14 | Charging/discharging level | 29 | Output indicator |
| 15 | AC output | 30 | Total output power |
See "LCD Screen Icons" for more details

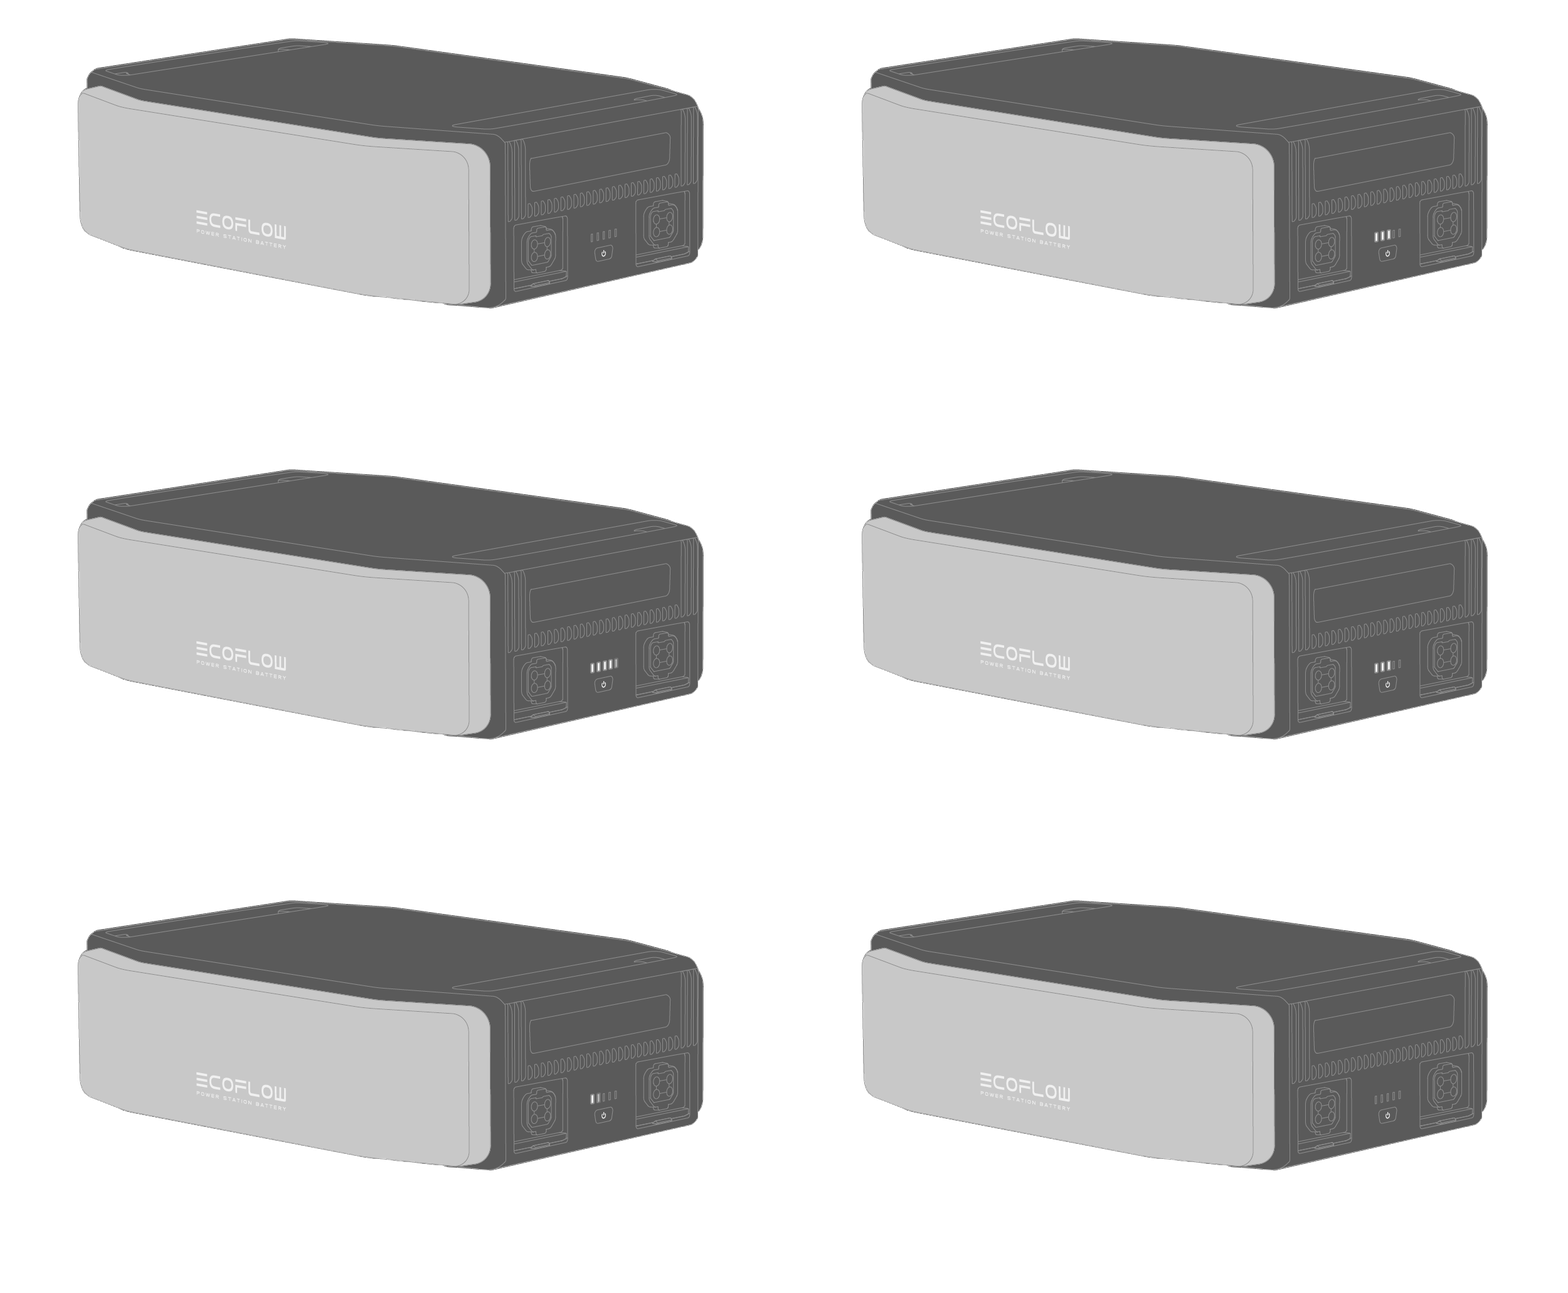
| Status | Description |
|---|---|
| Power on | LED 1 to 5 sequentially lights up |
| Power off | LED 5 to 1 sequentially shuts down |
| Discharging | 81%~100%: LED 1 to 5 solid 61%~80%: LED 1 to 4 solid 41%~60%: LED 1 to 3 solid 21%~40%: LED 1 to 2 solid 1%~20%: LED 1 solid 0%: LED 1 to LED 5 blinking |
| Charging | 0~20%: LED 1 blinks 21~40%: LED 1 remains solid, LED 2 starts to blink 41~60%: LED 1 to 2 remain solid, LED 3 blinks 61~80%: LED 1~3 solid, LED 4 blinks 81~99%: LED 1~4 solid, LED 5 blinks 100%: LED 1 to LED 5 remain solid |

CAUTION
- Please ensure that the product is installed in a well-ventilated place and do not block the ventilation fans during operation. Insufficient ventilation may damage the equipment.
- Install the portable stand, the battery and the inverter in sequence with the battery ports of both the inverter and battery installed on the same side, and ensure that the inverter and the battery are properly installed into the corresponding grooves.
- Open the protective covers and connect the battery connection cable.
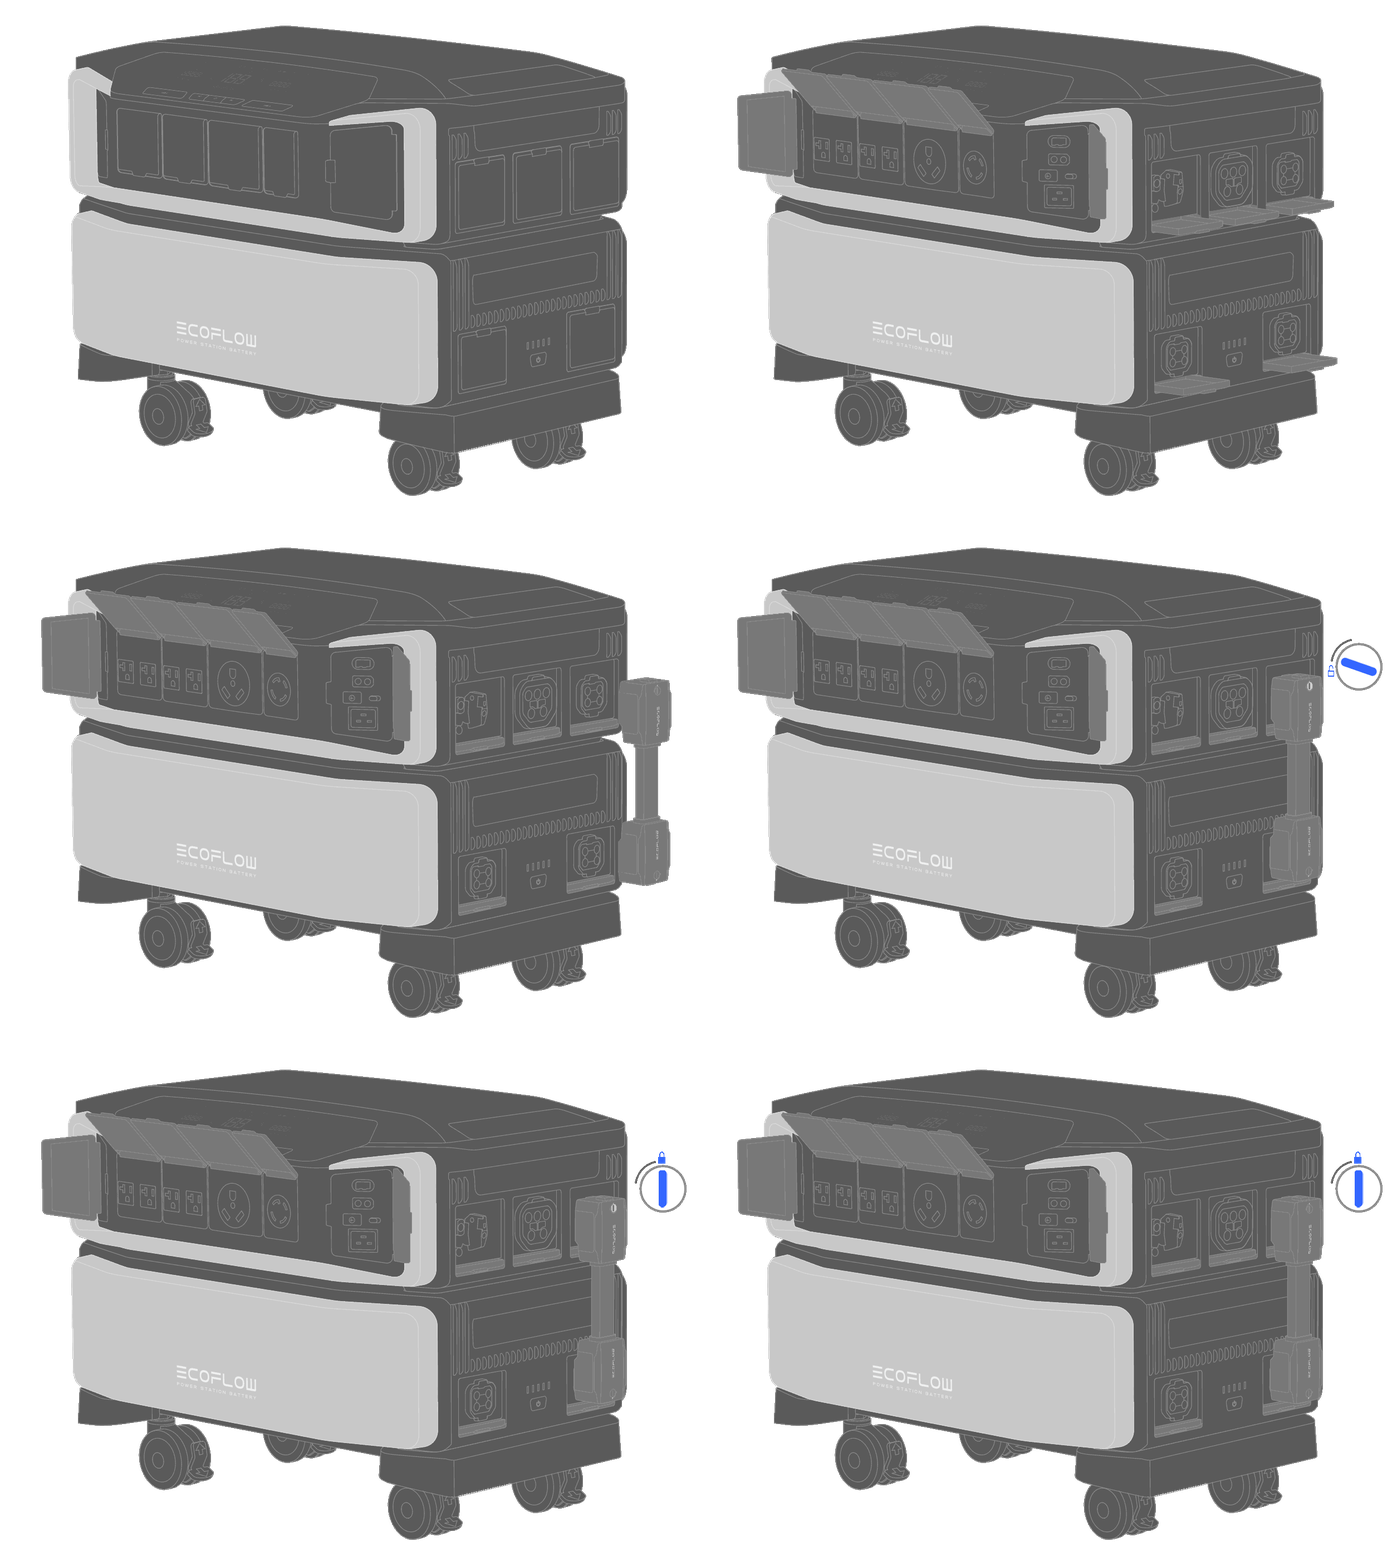
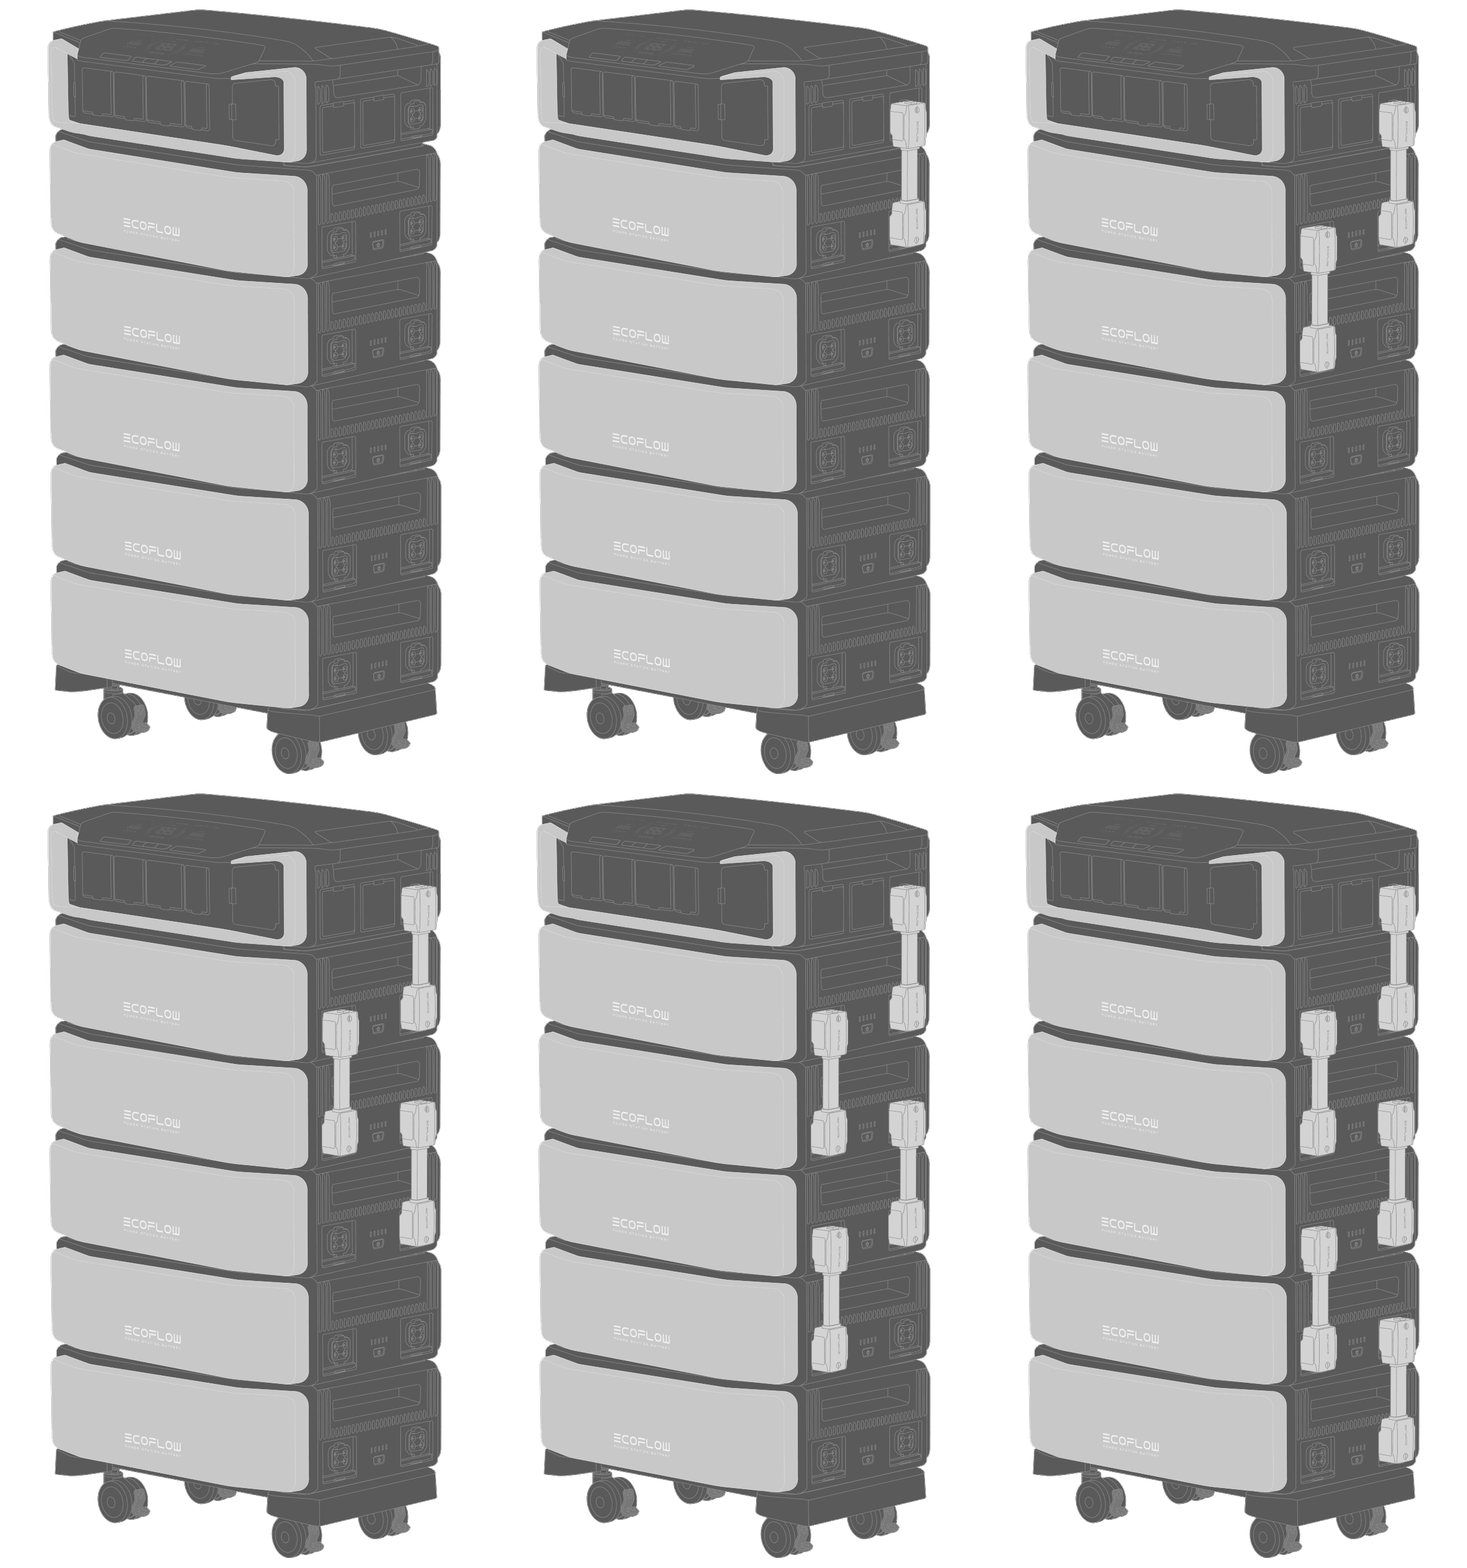
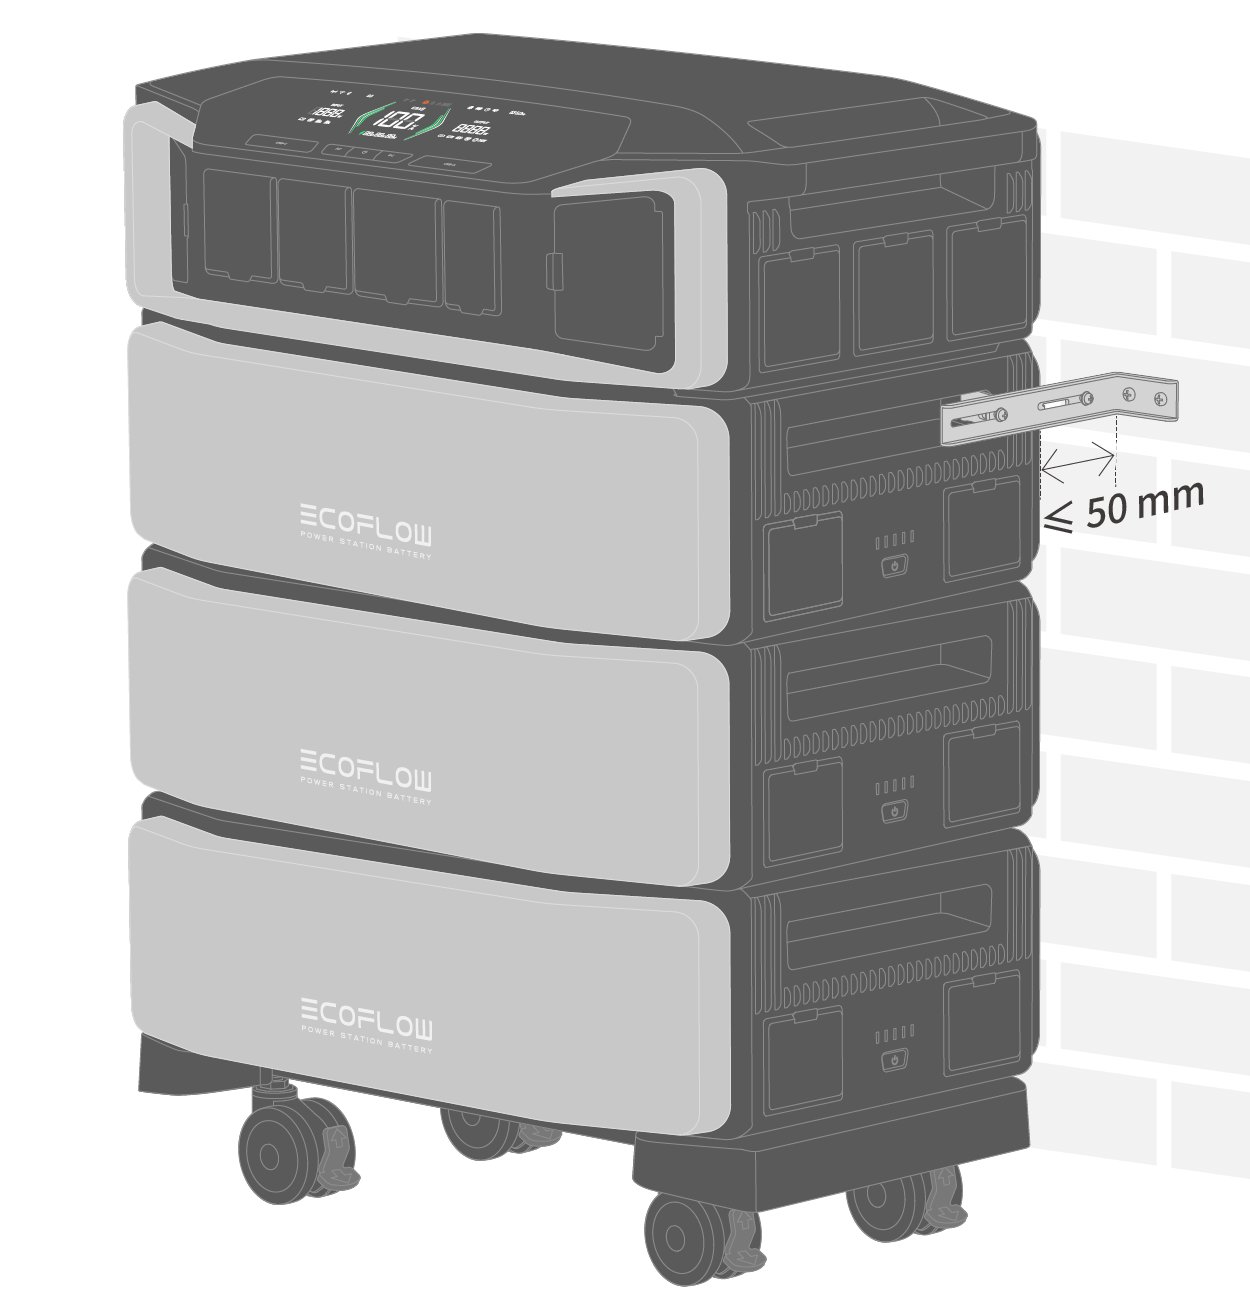
- An inverter supports up to 5 batteries. During installation, please note that battery connection cables should be installed in the right sequence as in the illustration. If you connect more than 3 batteries, lock the brakes of the mount casters after installation.
CAUTION
- To avoid accidental unplugging, we recommend that you lock the battery cable. After you mount the battery cable, you can lock the cable with a flathead screwdriver; when you need to remove the cable, remember to unlock it first.
- For long-time use, do not move the whole set of products if you connect the inverter to three or more batteries and lock casters by flicking the brake down, so that the product can't be moved anymore. If you need to move the product, flick the brake up to unlock the casters.
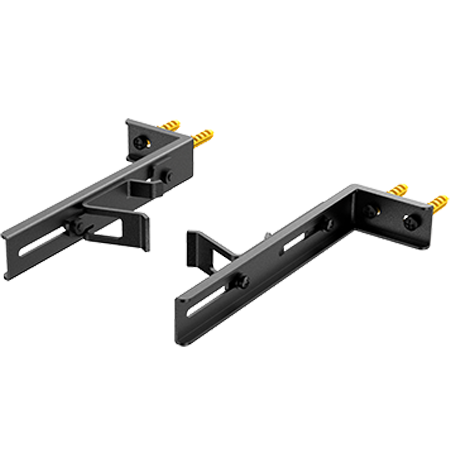
- We suggest that you fix the whole set of products with fixing metal tabs if you connect 3 or more batteries to the inverter. The fixing metal tabs are installed on the battery directly under the inverter. The recommended installation distance from the wall is 5cm for the purpose of heat dissipation.
- As the product is very heavy, we recommend that two people carry it to avoid potential personal injury.
- The portable stand needs to be installed on a hard, flat surface instead of soft surfaces (for example, dirt or sand). Do not place the portable stand on a tilted surface as it may cause the product to topple over, potentially resulting in personal injury or product damage.

If you have 2 sets of products, you can put one set on top of the other set. Be noted that the top set should be installed with supporting legs instead of casters.
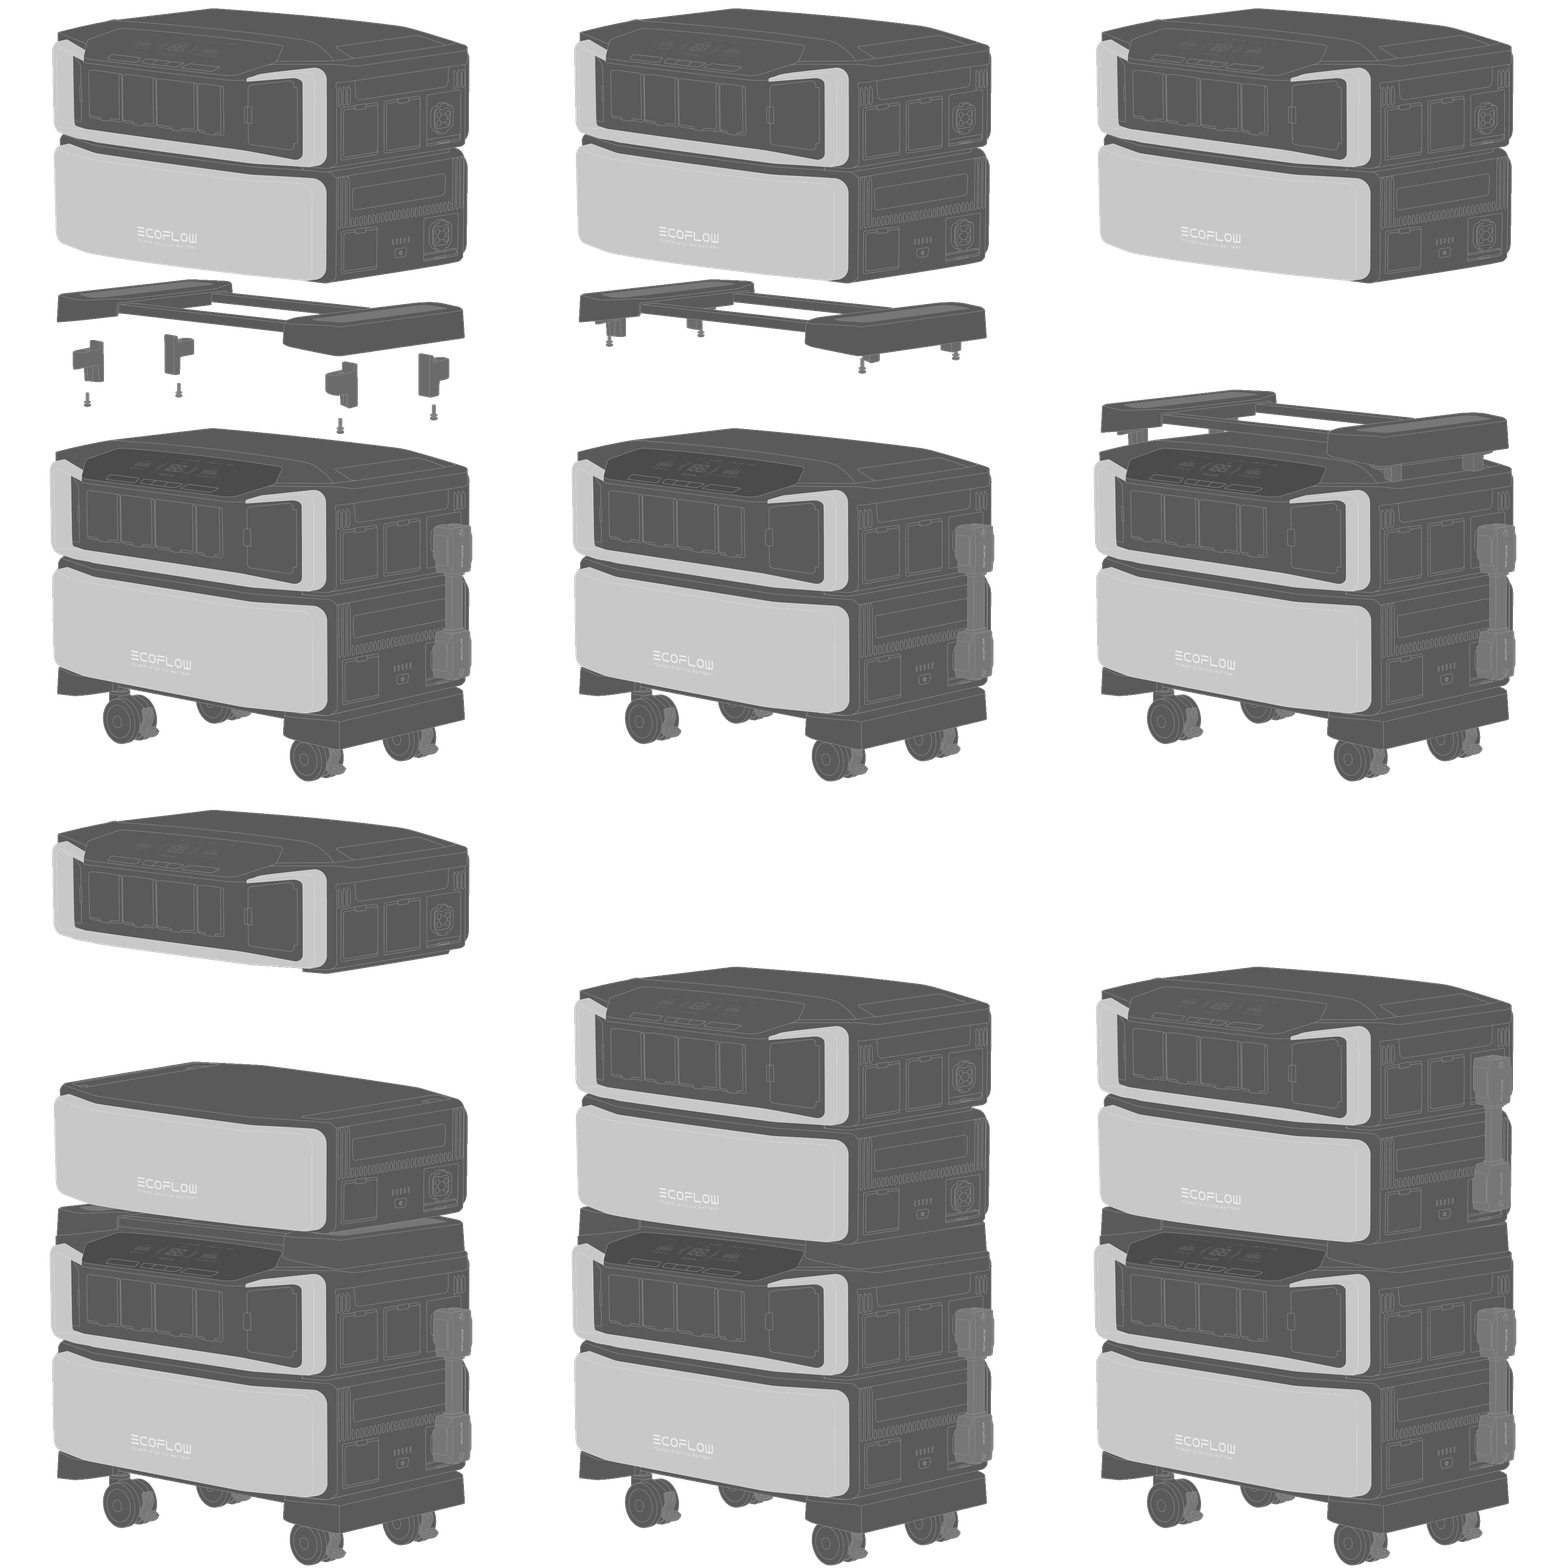
CAUTION
-
For this installation option, one can connect up to two batteries to an inverter.
-
The EcoFlow Fixing Metal Tabs need to be fixed to the battery under the top inverter.
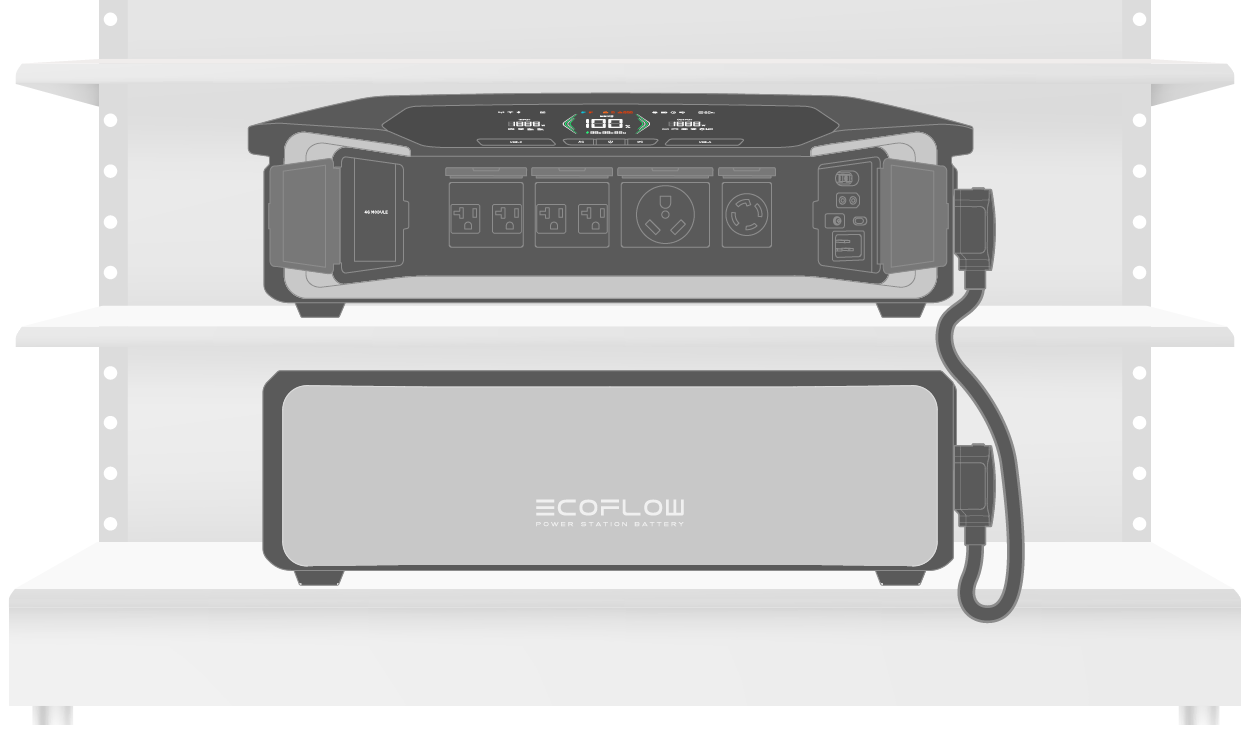
If you plan to put the inverter and the battery in different places (for example on a shelf, on the ground, etc.), you can connect them with a 0.75-meter long battery connection cable.

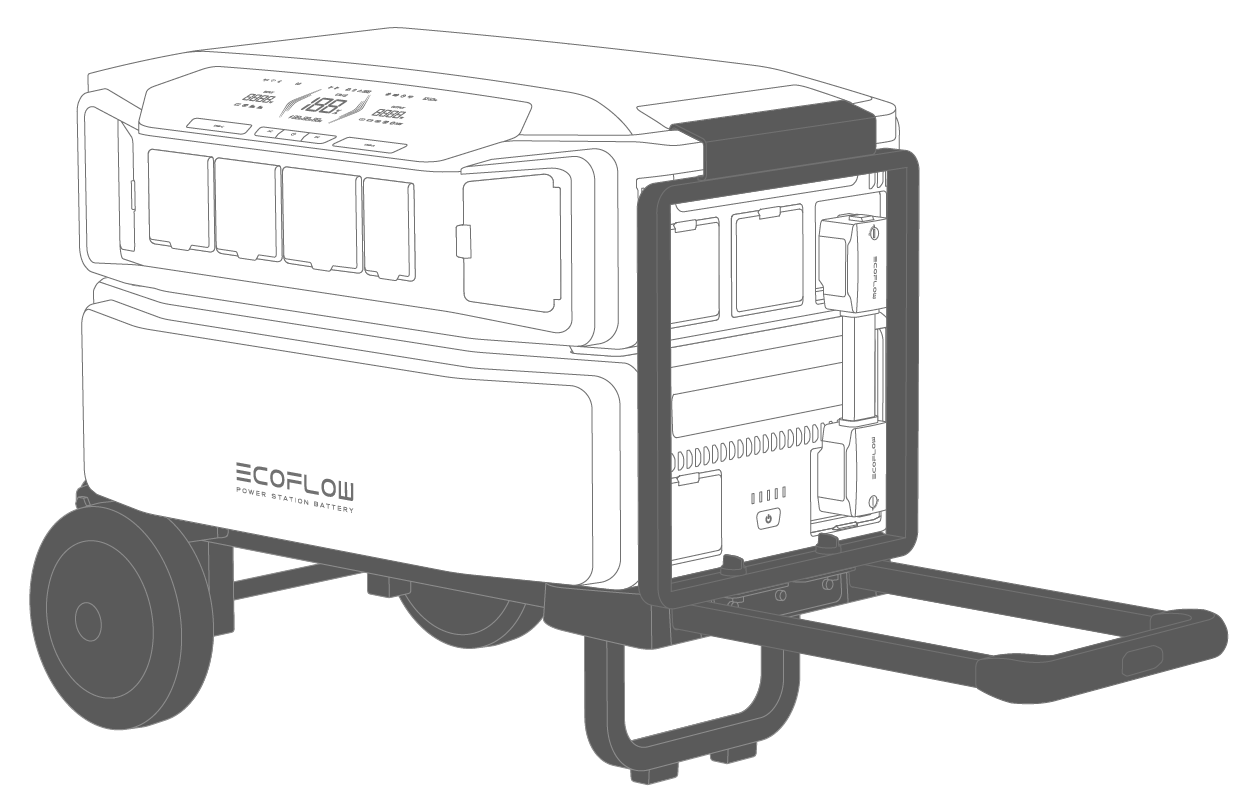
To easily move the product, you can also mount the set on the trolley, but please note that you can only mount one inverter and one battery on the trolley.

Long press the main power button of the inverter or the battery for 1 second to turn on the device. Press and hold for 2-3 seconds to turn off the device.
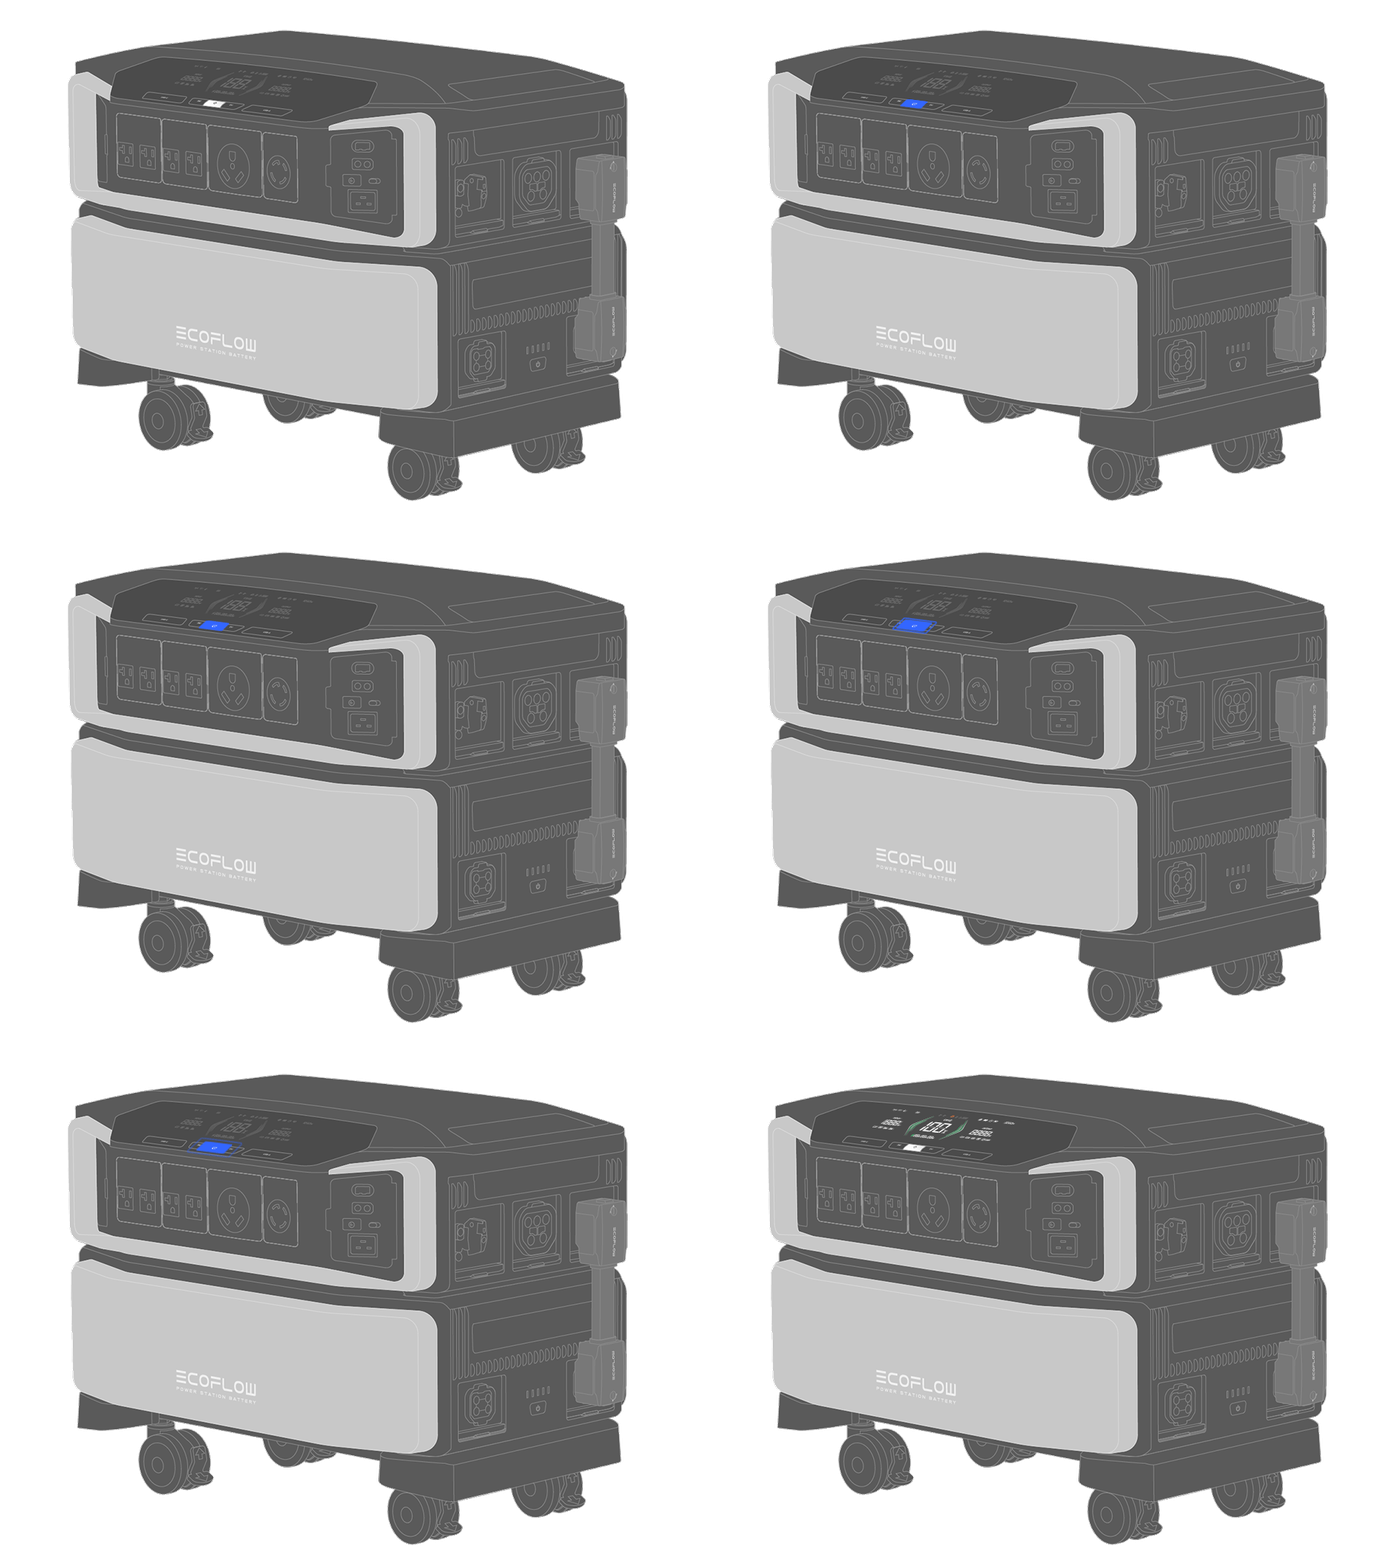
| Status | Description |
|---|---|
| Power on | long press for 1 second |
| LCD screen on/off | press once |
| Power off | press and hold for 2-3 seconds |
NOTICE
-
If the device is turned off, it will automatically turn on when you connect the product to a wall outlet.
-
When the device is turned on, the LCD screen will light up; pressing the main power button again will turn off the LCD screen but will not turn off the product.
-
If the inverter is connected to more than one battery, you can press & hold the main power button of any battery to turn on the product.
-
The device will go into standby mode, with the LCD screen shut down, if it hasn't been used for 5 minutes. When you start to use the product again, the LCD screen will turn on automatically.
-
The default standby time of the product is 2 hours. The device will automatically shut down if output power buttons are turned off or no loads are connected for 2 hours.
-
Press and hold the main power button for 10 seconds to reset the Bluetooth connection.
Press the AC power button to enable AC output ports, and press again to disable them.
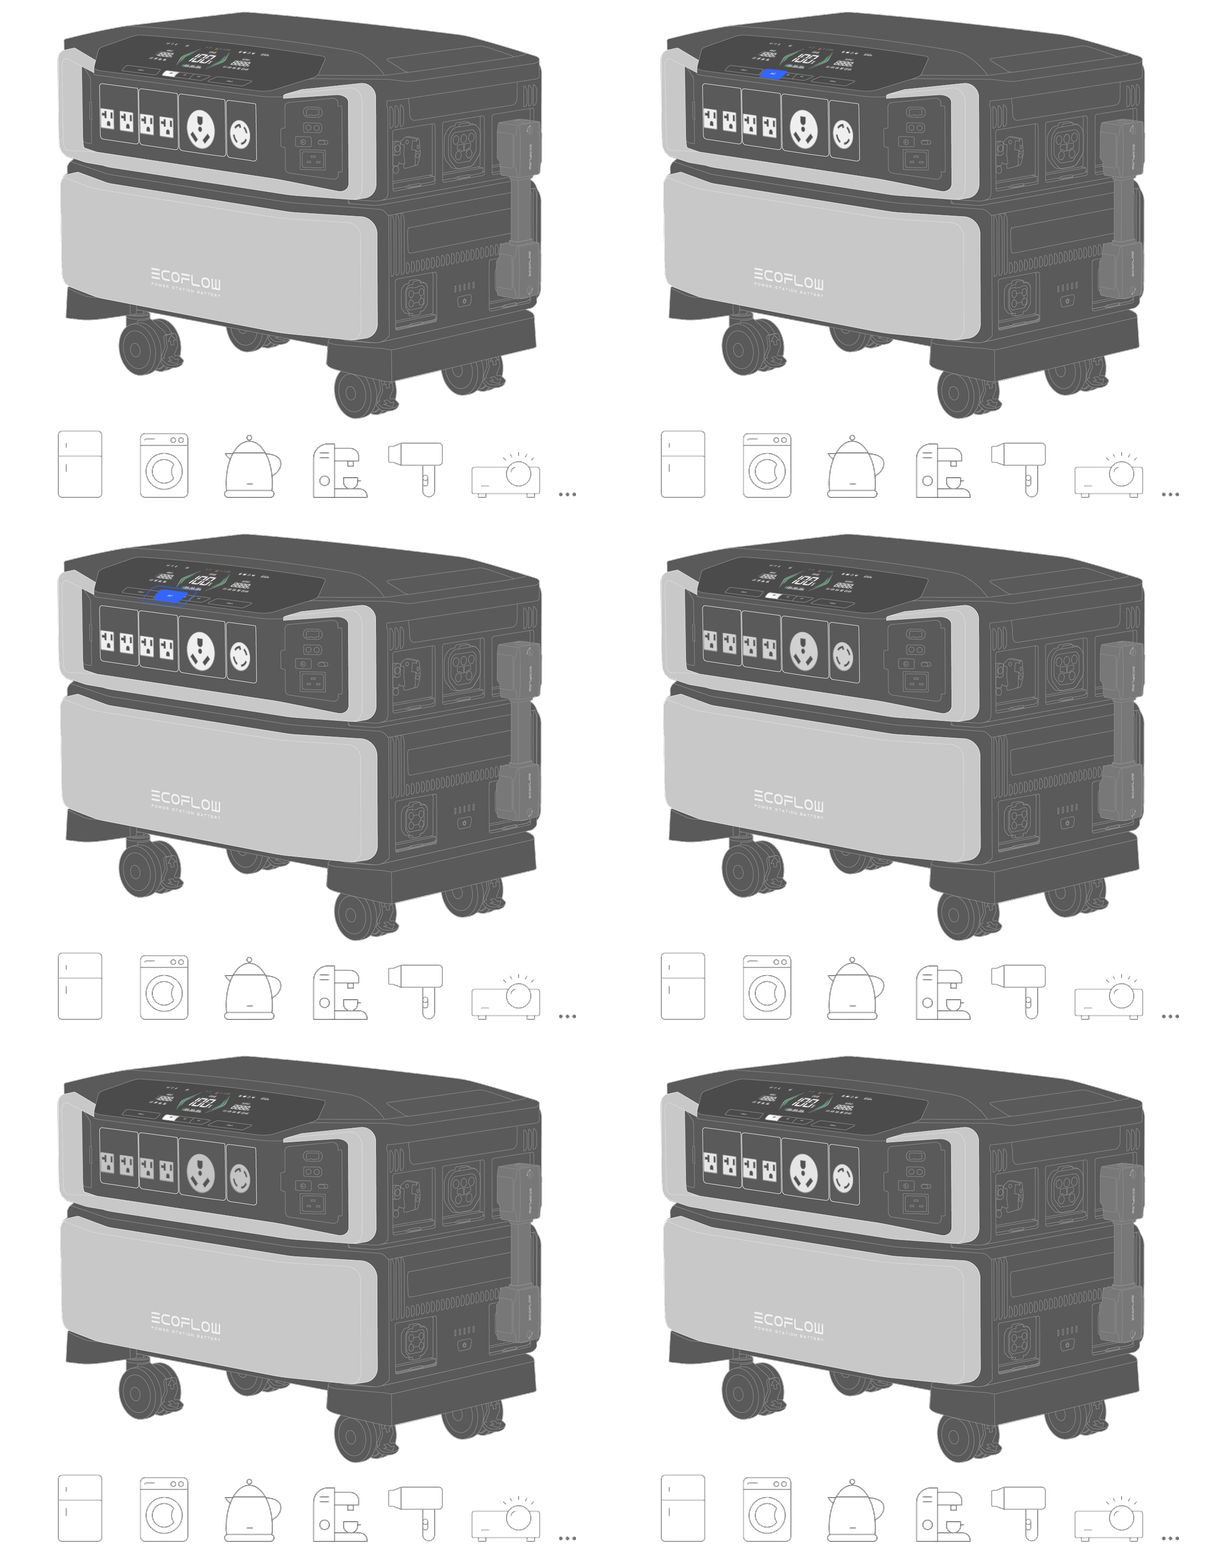
Press the DC power button to enable DC output ports, and press again to disable them.
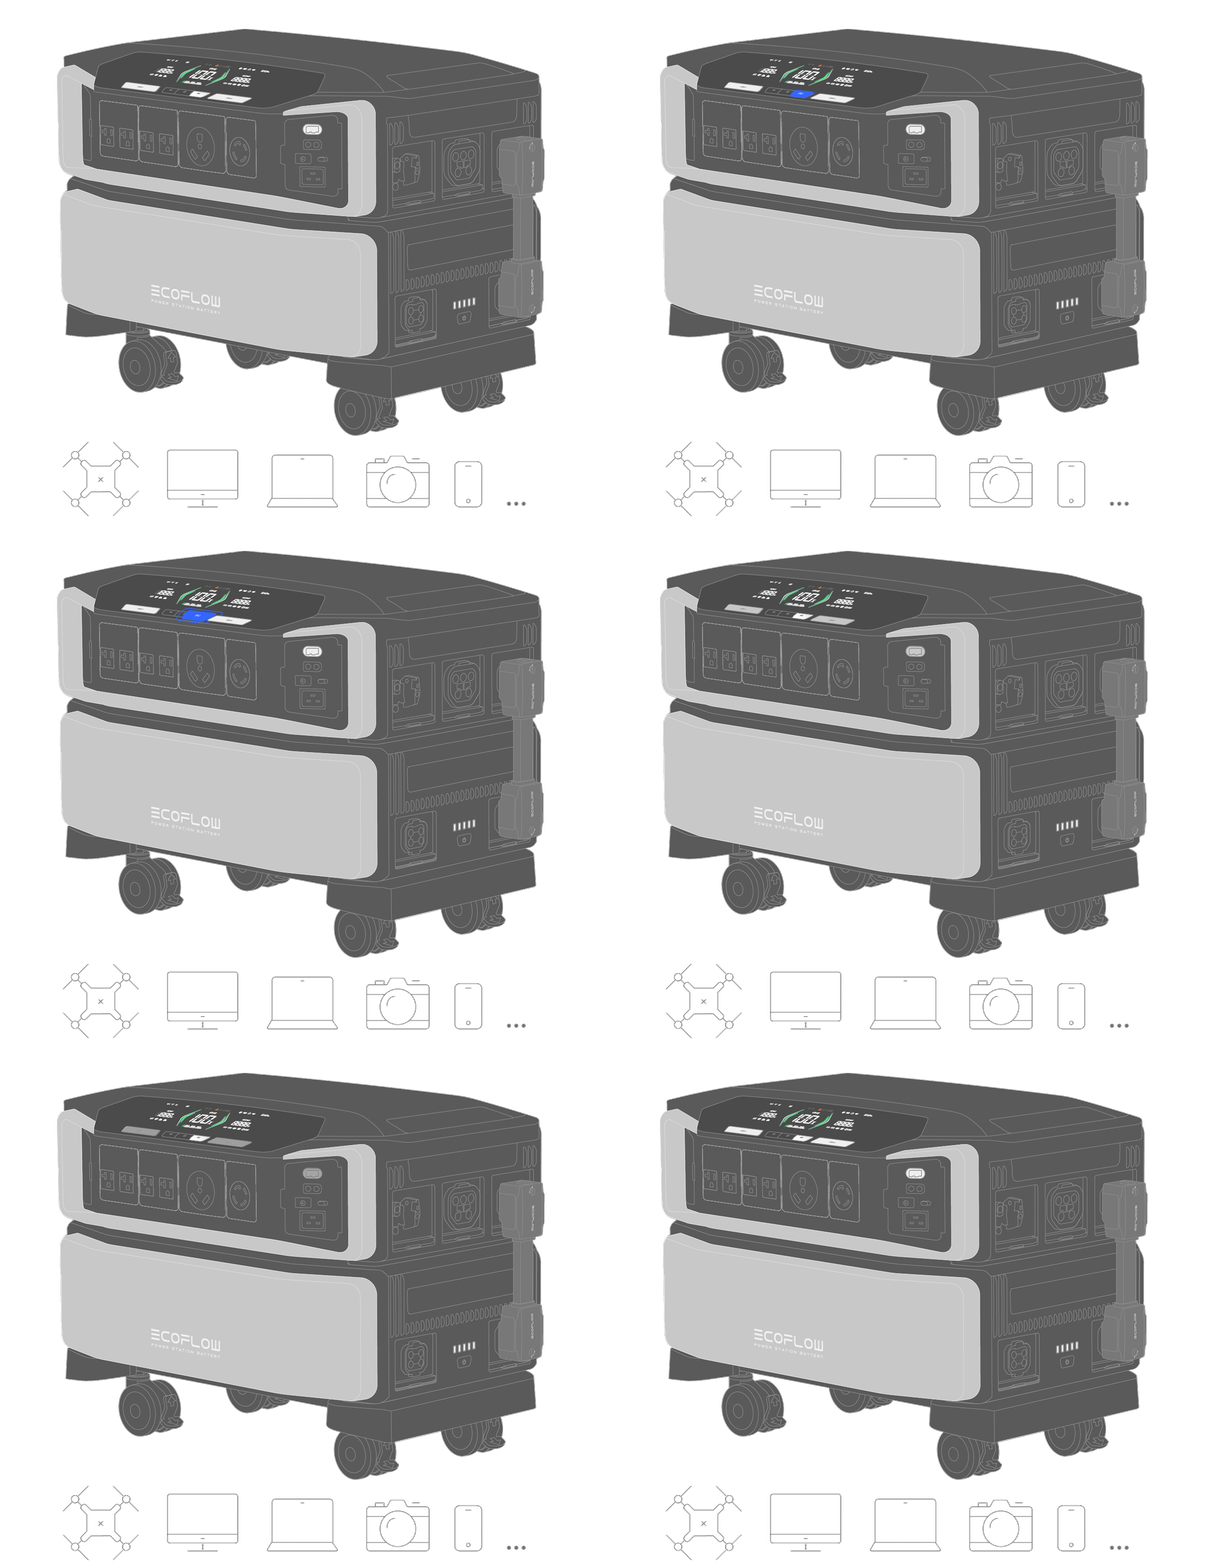
NOTICE
-
Ensure that the product is turned on (see "Power On/Off" for more details) before enabling DC/AC output.
-
Ensure that the total power of all loads is less than the rated power of the product.
-
After 12 hours of no load for the AC output ports, the AC power button will turn off automatically.
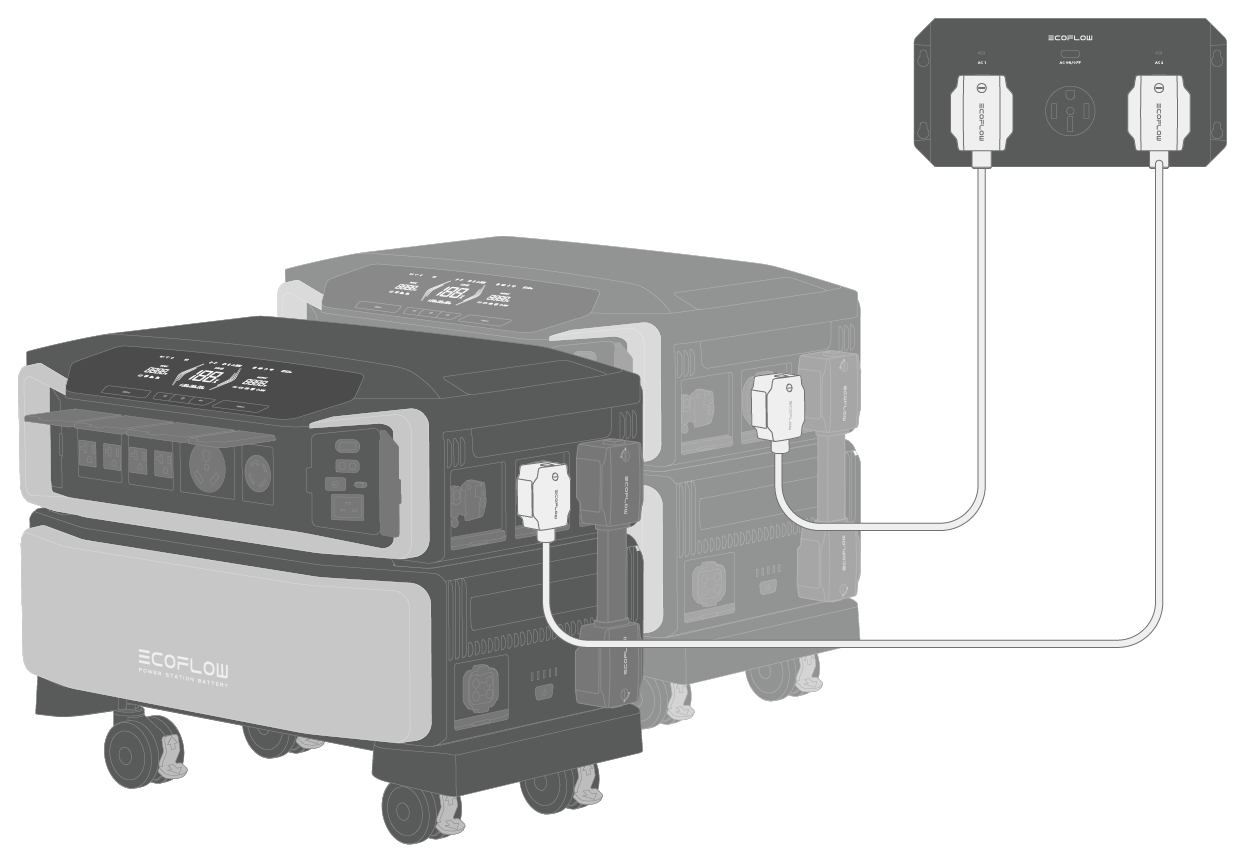
You can connect one or two sets of DELTA Pro Ultra to the EcoFlow 50 Amp Hub for recharging your car or other NEMA 14-50 plug-based appliances. To successfully link one or two sets of DELTA Pro Ultra, follows steps below:
- Connect one or two sets of DELTA Pro Ultra to the EcoFlow 50 Amp Hub.
- Tap the main power button to power on DELTA Pro Ultra
- Press the AC on/off button of the 50 Amp hub to link.
You can recharge the product by connecting the supplied AC charging cable to the fast charging input port of the product and a wall outlet. To adjust the charging speed, you can either flick the AC charging speed switch or set it up in the EcoFlow app.
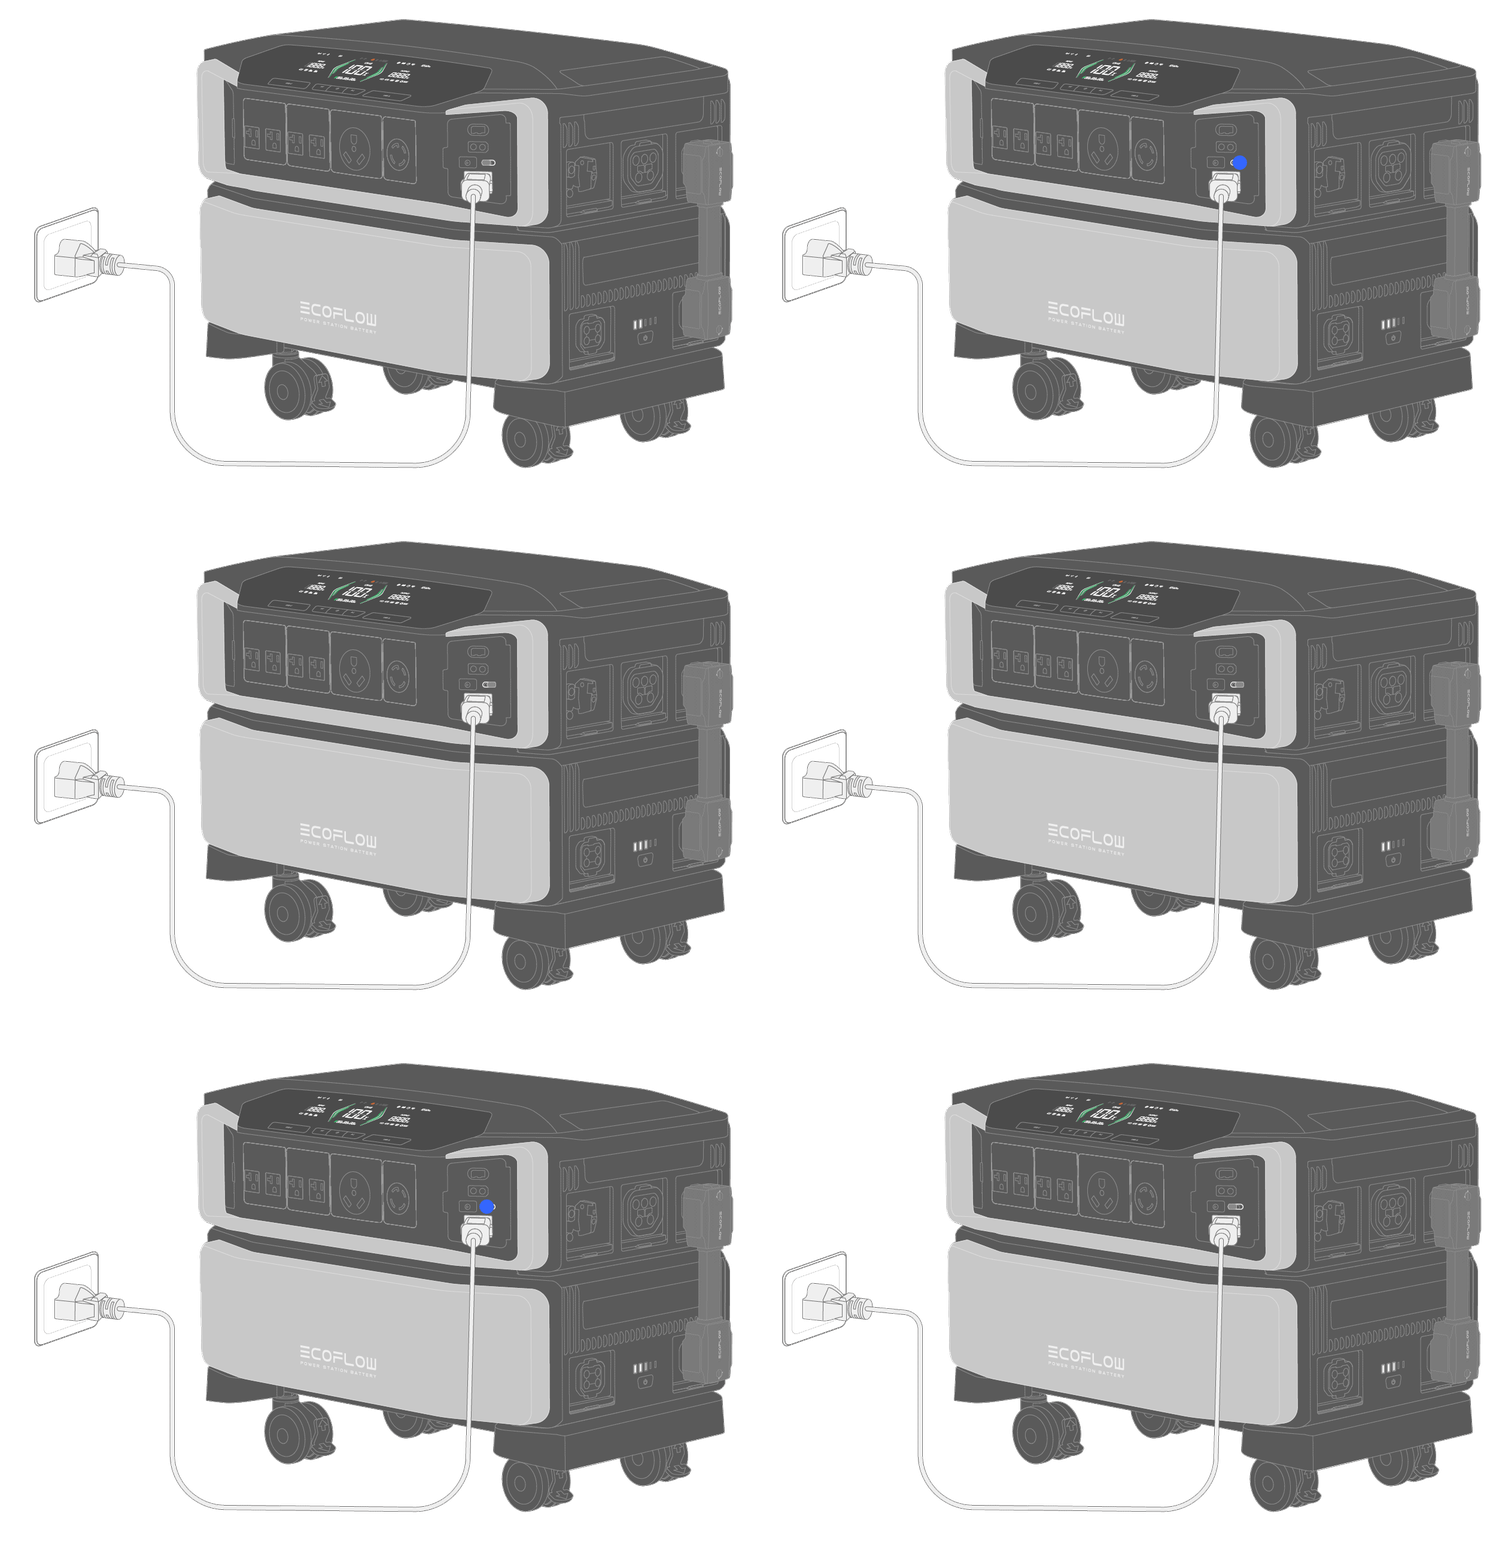
Adjust The AC Charging Speed
The charging speed can be adjusted via the AC charging speed switch. Turn the switch to the left, the charging speed will be at its peak; turn the switch to the right, and the charging speed will return to the default value. You can set the charging speed in the app.
CAUTION
- Keep the AC power button off while recharging the product through a high-voltage wall outlet.
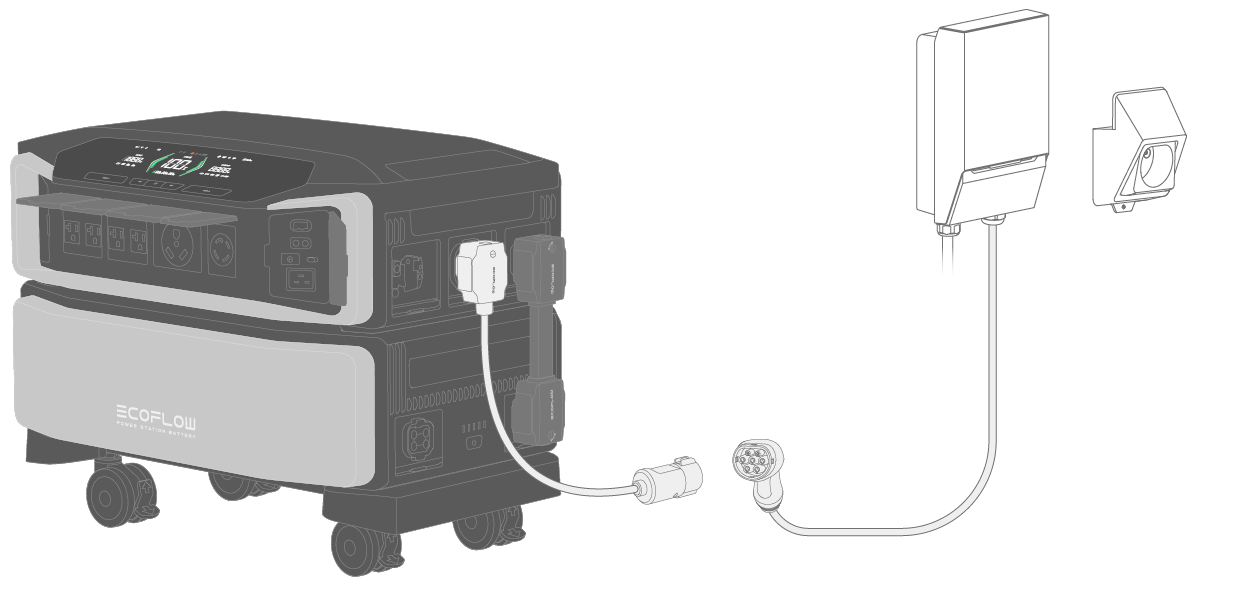
Connect your EV charger to the product to enable charging via the EV charger.
If you are unsure how to connect your EV charger to the product, refer to the user manual for EV charger or contact the manufacturer for details. To enable EV charging, please follow steps as follows:
-
Connect one side of the EV adapter to the power input/output port and the other side to the EV charger.
-
Turn on main power button of DELTA Pro Ultra.

Connect your generator to the product to enable charging via the generator.
If you are unsure how to connect your generator to the product, refer to the user manual for generator or contact the manufacturer for details.
Ensure that the power of the product is lower than that of your generator, and then connect one side of the generator to the power input/output port or AC charging input port and the other side to the generator.
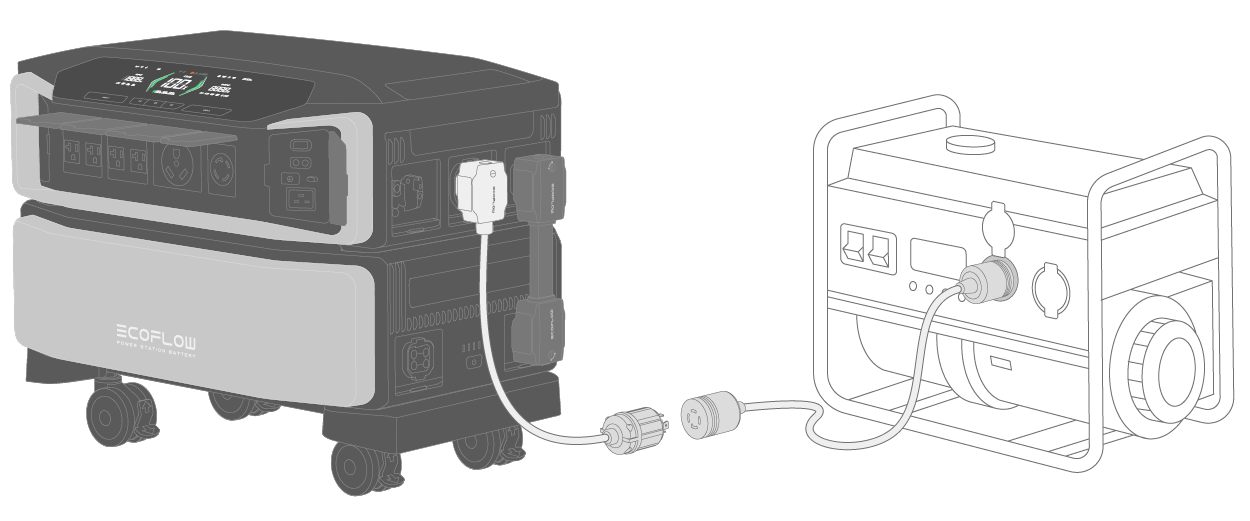
DELTA Pro Ultra supports conventional generators with THD less than or equal to 10%.

DANGER
- To securely connect this product to the PV system circuit, we recommend that you consult qualified personnel for installation and other details.
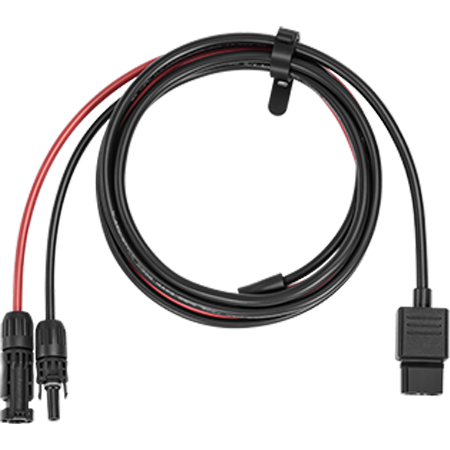
- Solar panels and high-PV input charging cables are not included in the box; please purchase them on the EcoFlow official website and ensure that solar connectors of solar panels are compatible with high-PV input ports.
- The total output of the solar panels and the sunlight intensity determine the duration of the solar charging.
- When connecting solar panels in series, ensure that the maximum voltage output of all panels is within 30V-150V for the low-PV input port, and 80V-450V for the high-PV input port (you can choose either low-PV or high-PV if the maximum voltage output of all panels is between 80V and 150V).
- To avoid product damage, ensure that the solar panels are properly connected to the low-voltage PV or high-voltage PV input port.
- If you connect the EcoFlow DELTA Pro Ultra to PV system circuits installed on or in buildings, according to NEC regulation, the system shall include a rapid shutdown function to ensure the safety of operation and reduce shock hazard for emergency responders.
- If you wish to connect the EcoFlow DELTA Pro Ultra to PV system circuits, the consultation before purchase and the installation must be done by a qualified electrician or installer.
- To connect two or more solar panels to the inverter, please ensure that you use the same type of solar panels.
WARNING
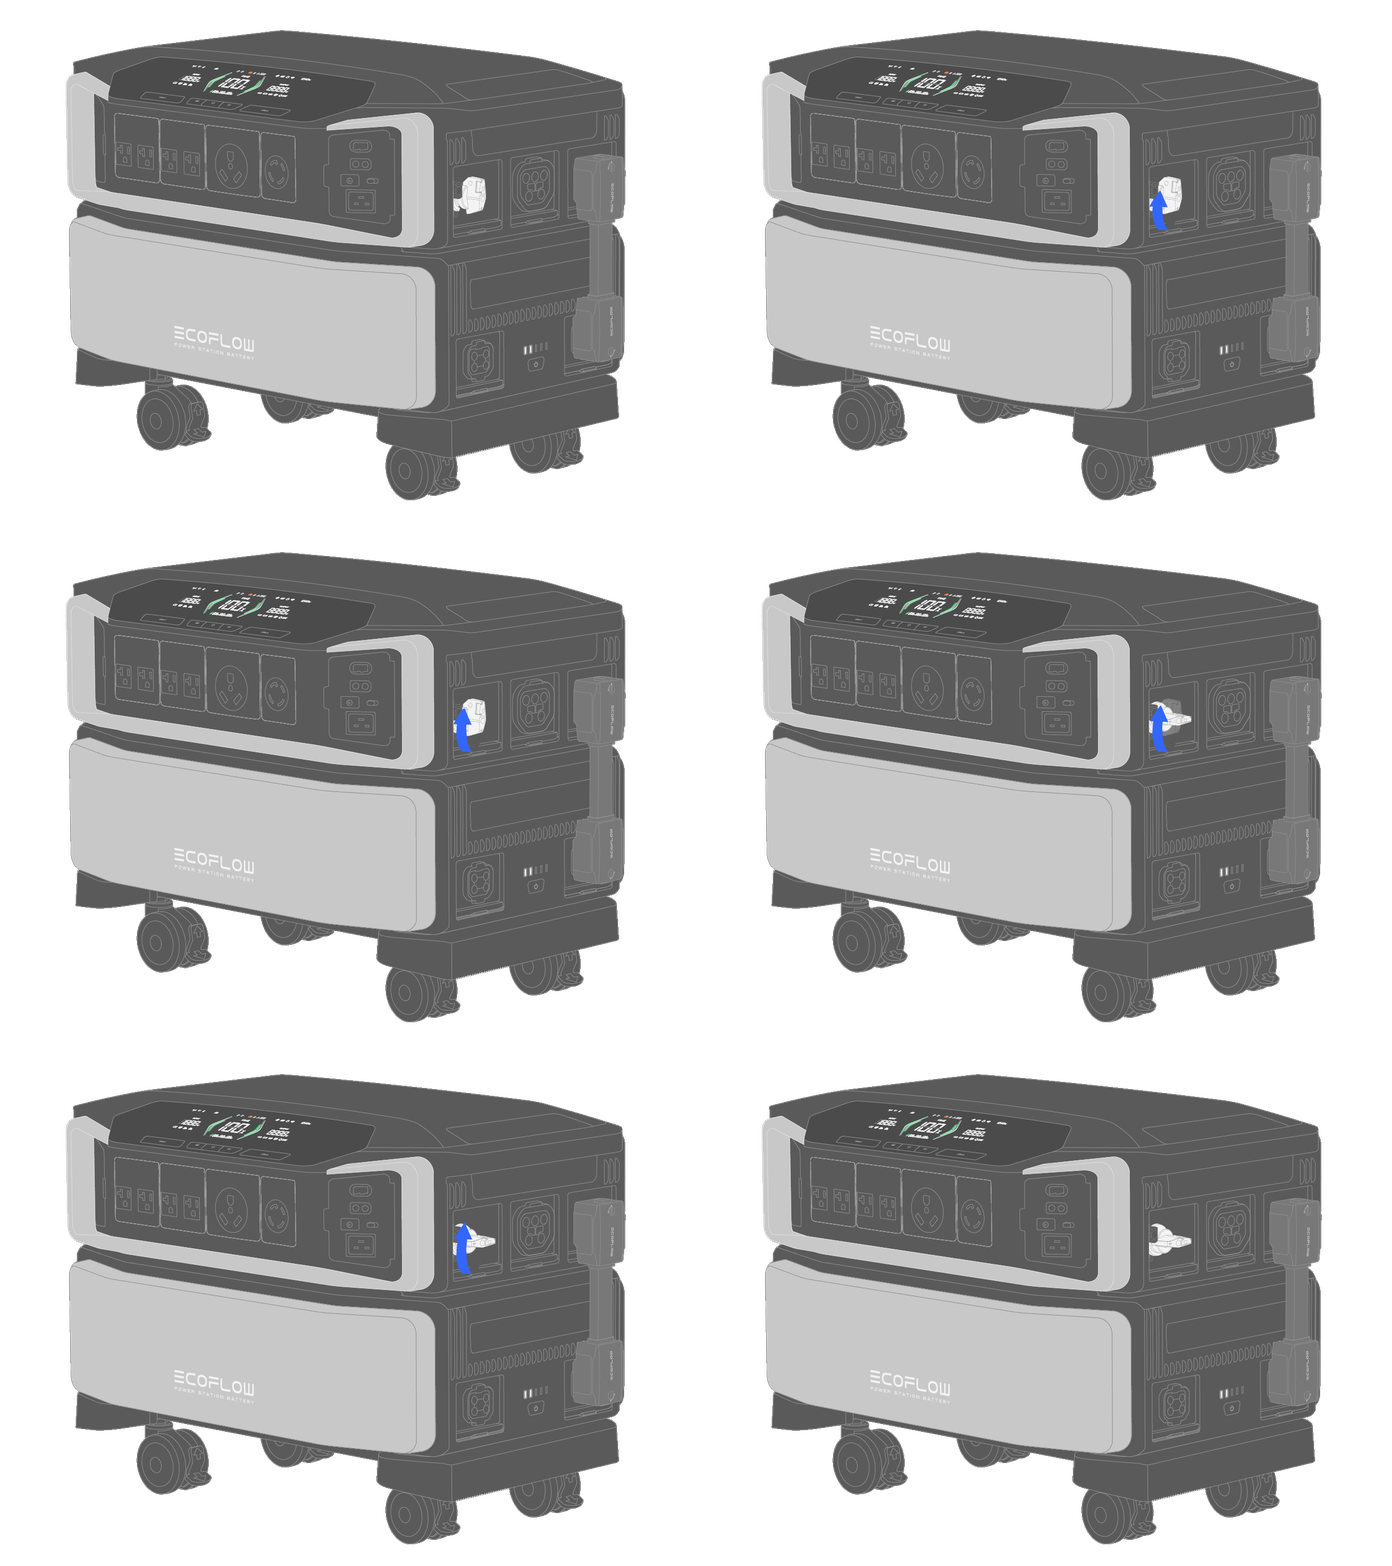
- Keep the PV switch "OFF" when connecting solar panels to the product.
- Whether you connect the solar panels to the low-PV input port or high-PV input port, you need to turn on the PV switch to enable solar charging once the solar panels are connected.
NOTICE
When the product connected to PV modules is put inside the building, it needs to be grounded to reduce the risk of electric shock. Before using the ground terminal, consult a qualified electrician, electrical inspector, or local agency having jurisdiction for local codes or ordinances that apply to the intended use of the product.
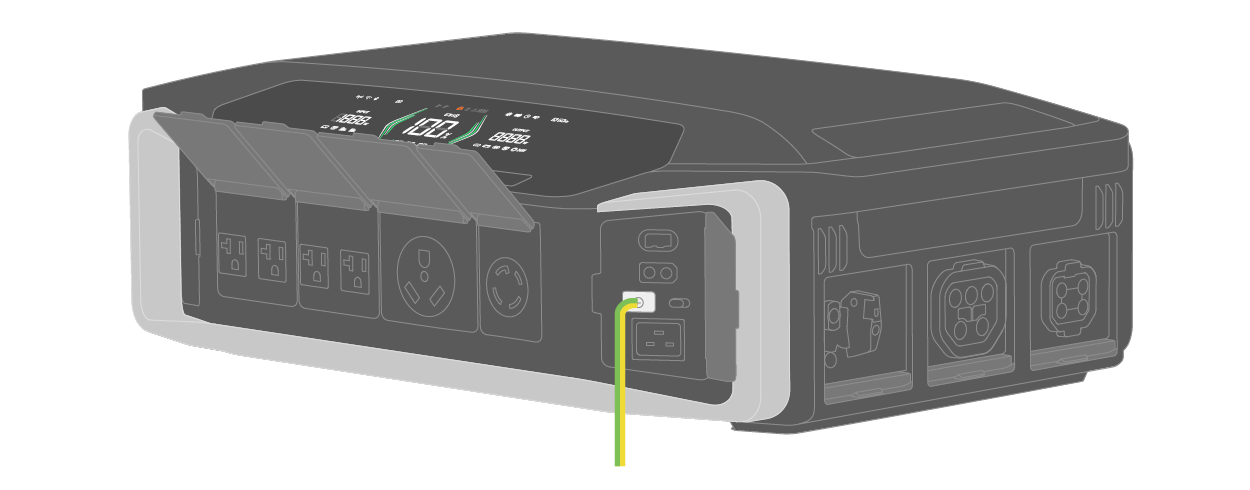
1. Connect to solar panels
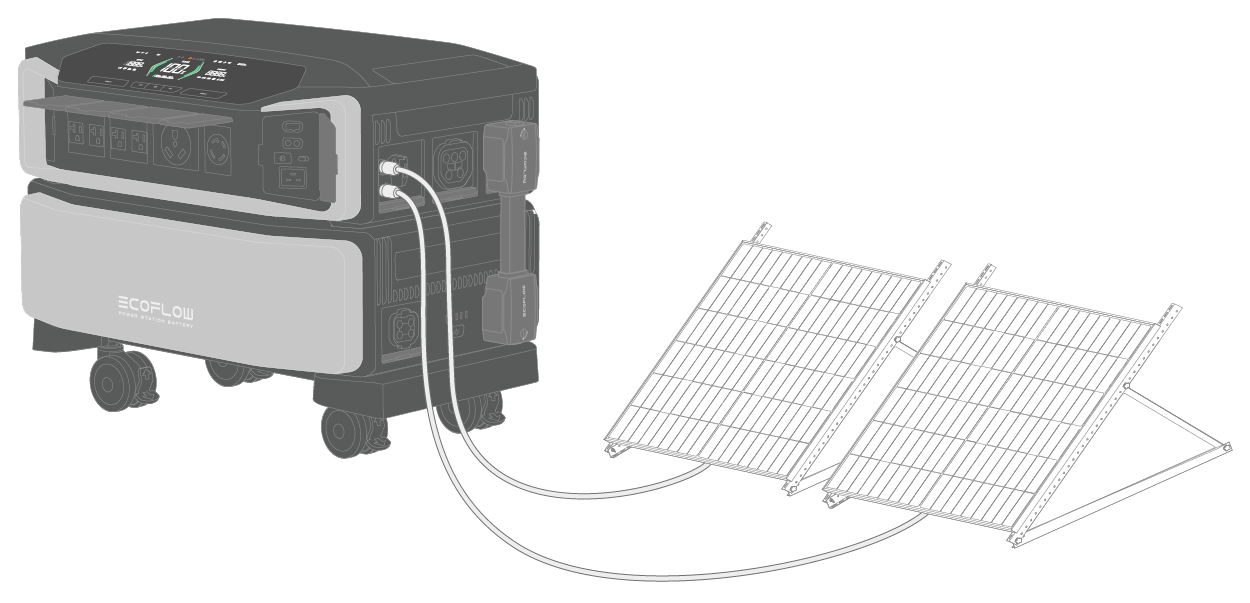
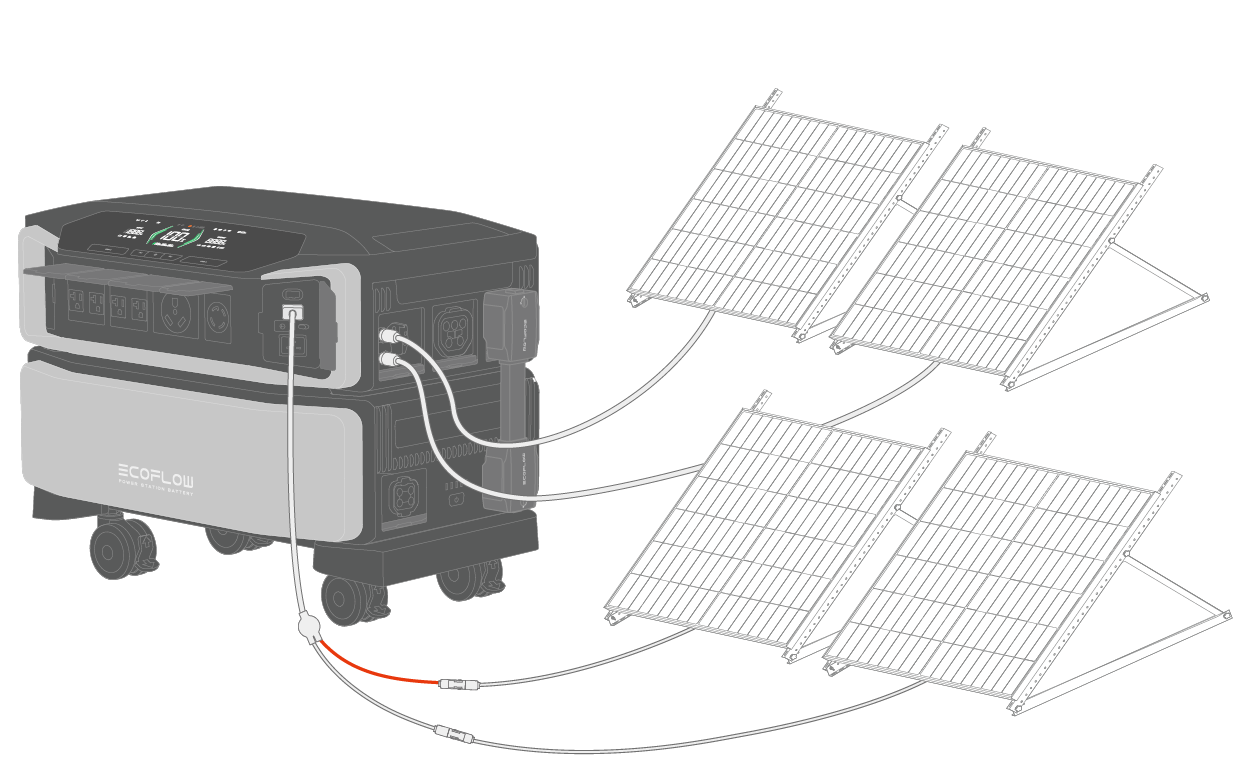
Connect in series
- Low-PV input voltage range: 30V < total solar input < 150V
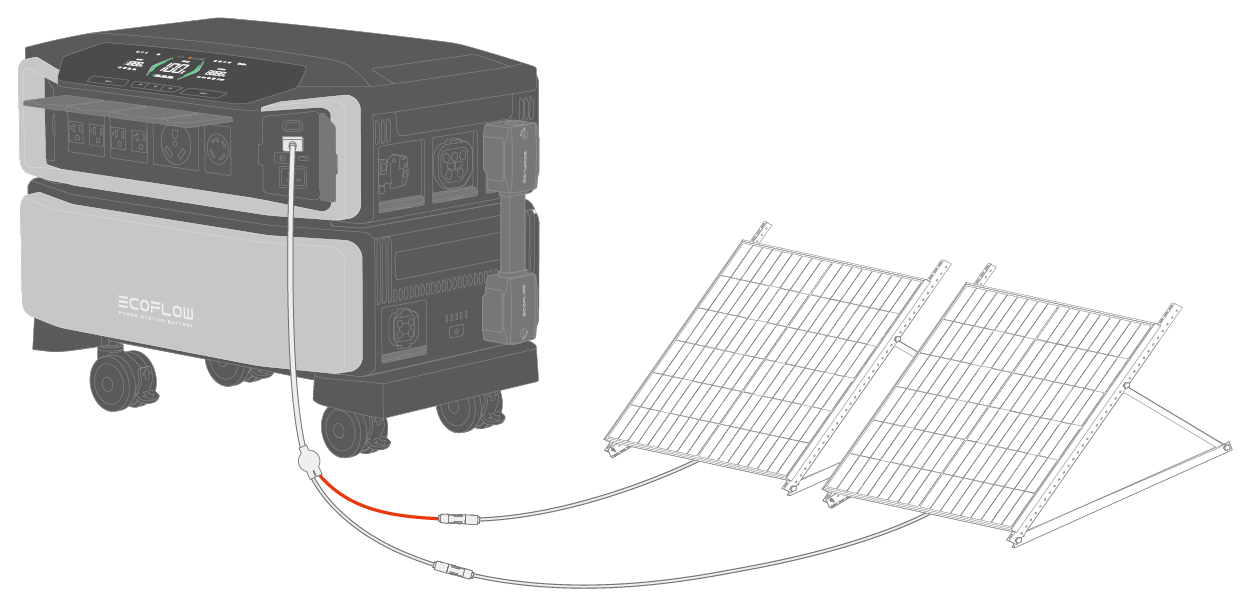
- High-PV input voltage range: 80V < total solar input < 450V
- Low-PV input + high-PV input
Voltage range for low-PV input: 30V < total solar input < 150V
Voltage range for high-PV input: 80V < total solar input < 450V
Connect in parallel
We do not recommend that you connect solar panels to the device in parallel because the maximum current of high-PV and low-PV input ports is 15A; but if you need to, please ensure that total current input of solar panels does not exceed 15A.
How many EcoFlow solar panels can I connect?
-
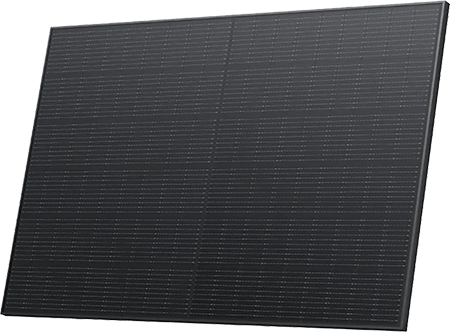
Please refer to the following specs for more details if you are uncertain about the number of EcoFlow solar panels (Portable solar panels and Mountable solar panels) required for low-PV or high-PV input port.
-
When the ambient temperature falls below 0°C (32°F), the input voltage of solar panels may increase, potentially exceeding the voltage range of DELTA Pro Ultra, which may lead to invalid input. Therefore, it is not advisable to connect 6, 8, or 10 panels in series with 220W portable panel, 400W portable panel, and 400W rigid panel at a low temperature.
EcoFlow 220W Bifacial Portable Solar Panel
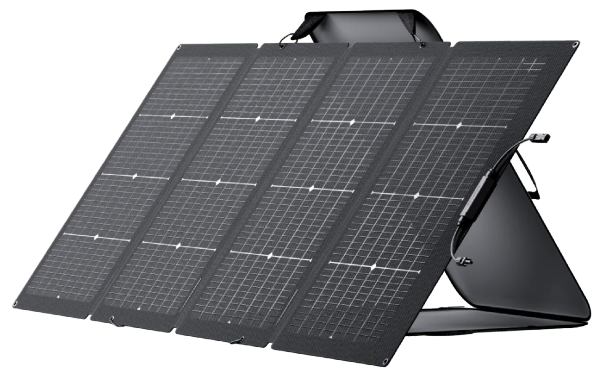
| Connection | Number of Panels | Input Voltage (V) | Input Port |
|---|---|---|---|
| Series | 2 | 43.6 | Low-PV |
| Series | 3 | 65.4 | Low-PV |
| Series | 4 | 87.2 | Low-PV |
| Series | 5 | 109 | Low-PV or High-PV |
| Series | 6 | 130.8 | Low-PV or High-PV |
EcoFlow 400W Portable Solar Panel
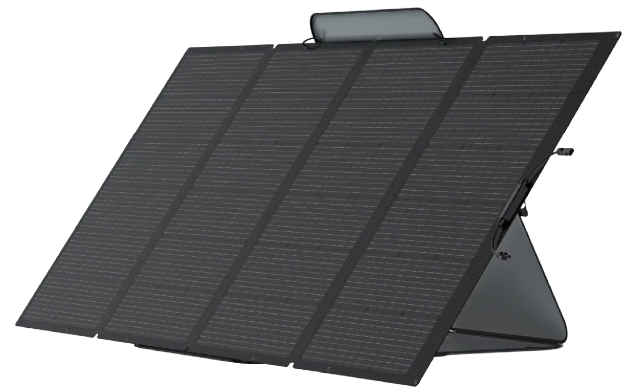
| Connection | Number of Panels | Input Voltage (V) | Input Port |
|---|---|---|---|
| Series | 2 | 96 | Low-PV or High-PV |
| Series | 3 | 144 | High-PV |
| Series | 4 | 192 | High-PV |
| Series | 5 | 240 | High-PV |
| Series | 6 | 288 | High-PV |
| Series | 7 | 336 | High-PV |
| Series | 8 | 384 | High-PV |
EcoFlow 400W Rigid Solar Panel
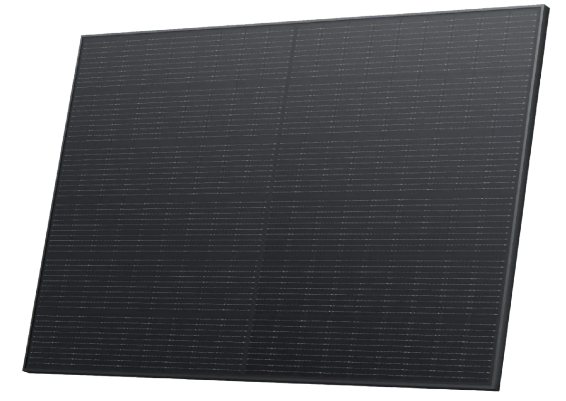
| Connection | Number of Panels | Input Voltage (V) | Input Port |
|---|---|---|---|
| Series | 2 | 74.2 | Low-PV |
| Series | 3 | 111.3 | Low-PV or High-PV |
| Series | 4 | 148.4 | High-PV |
| Series | 5 | 185.5 | High-PV |
| Series | 6 | 222.6 | High-PV |
| Series | 7 | 259.7 | High-PV |
| Series | 8 | 296.8 | High-PV |
| Series | 9 | 333.9 | High-PV |
| Series | 10 | 371 | High-PV |
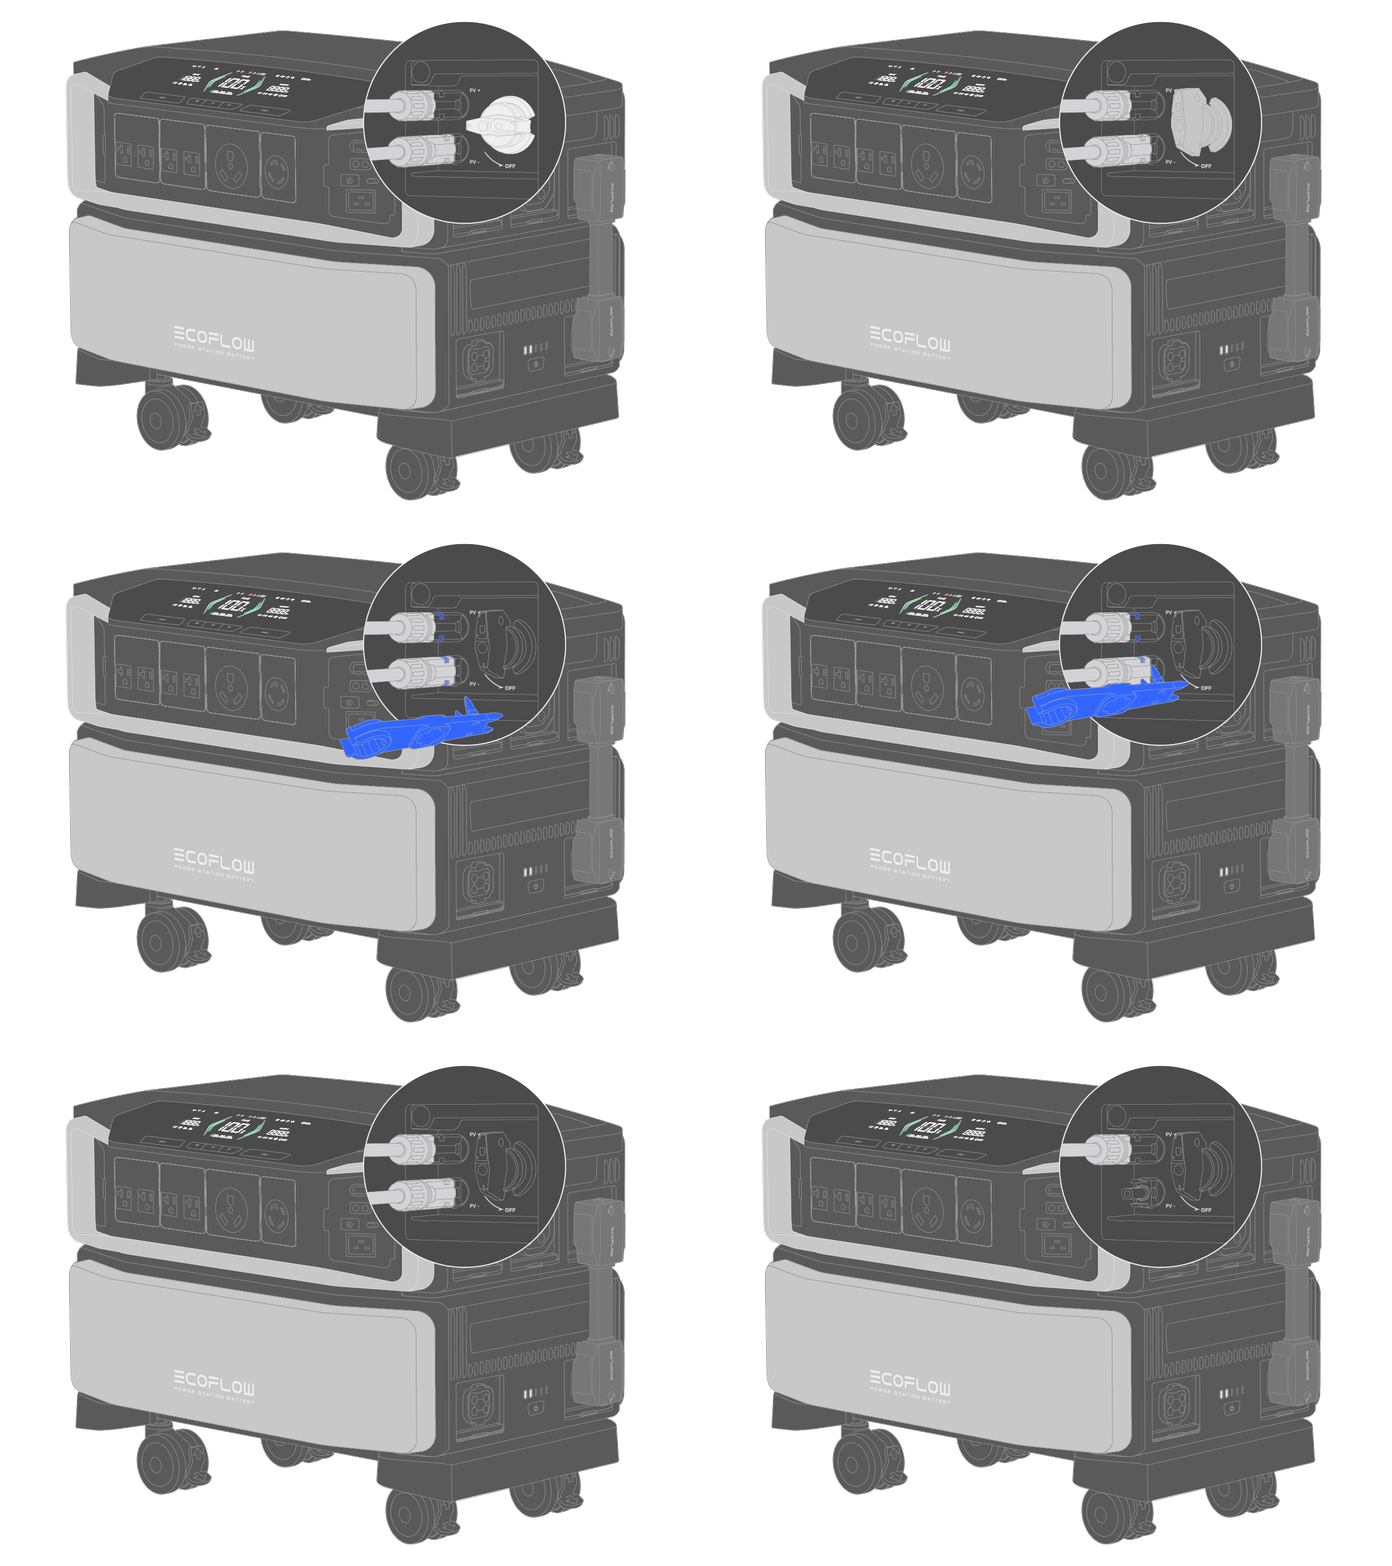
2. Remove solar charging cables
To remove solar charging cables, especially cables connected to the high-PV input ports, follow steps below:
- Turn off the PV switch.
- Align the d/a tool with solar connectors and detach them manually once they have dislodged off from the high-PV input ports.
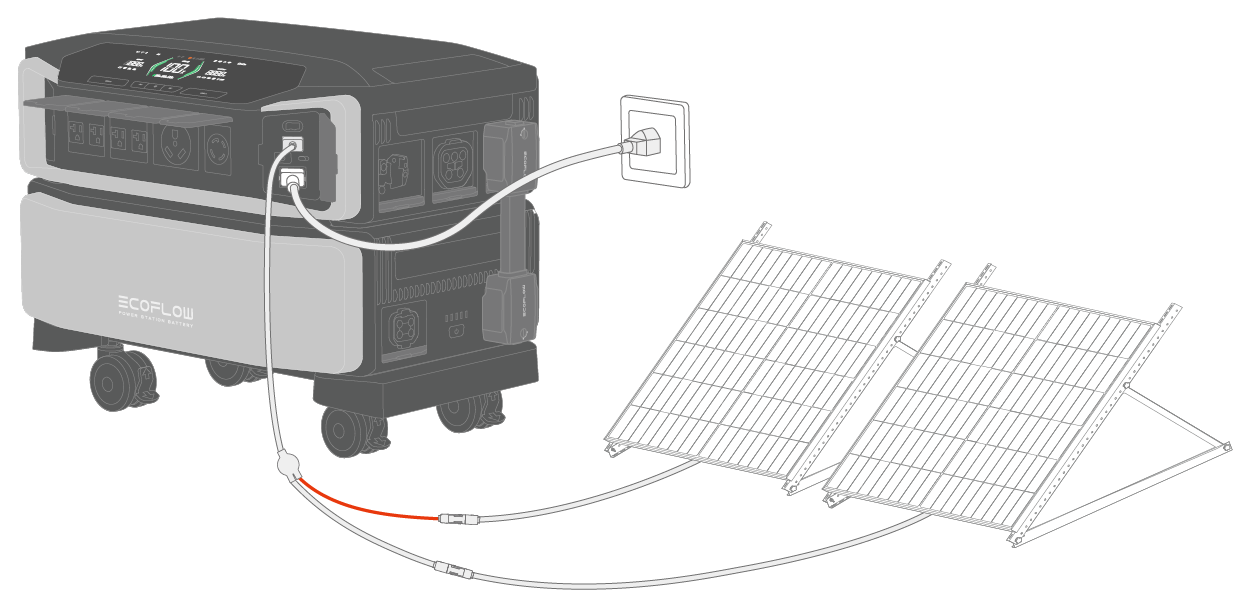
Solar charging + AC charging
Connect the product to solar panels and a wall outlet at the same time.
Solar charging + generator
Connect the product to solar panels and a generator at the same time.
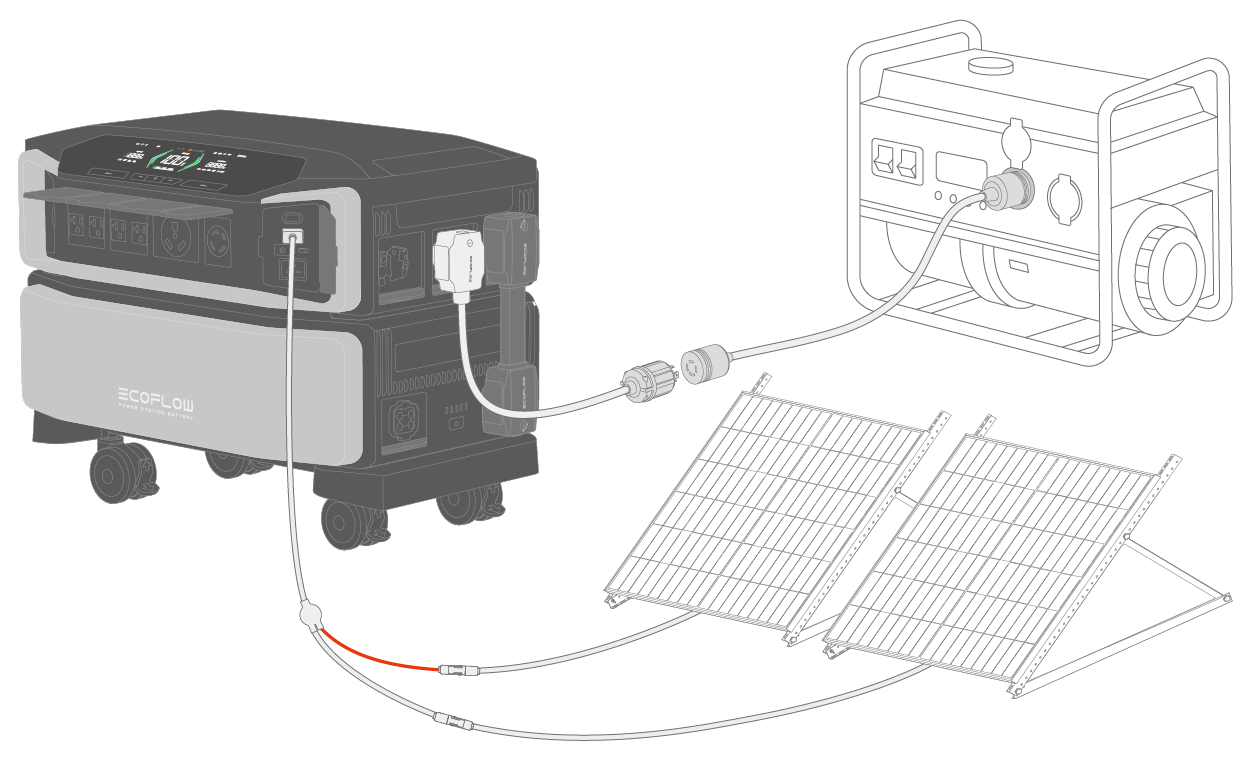
NOTICE
-
When both AC charging input port and power input/output port are connected to the product, the power input/output port will be preferably chosen for charging whereas AC charging will not be able to work
-
When you connect the product to more than one option for recharging, you can either connect to low-PV or high-PV input ports only, or both low- and high-PV input ports.

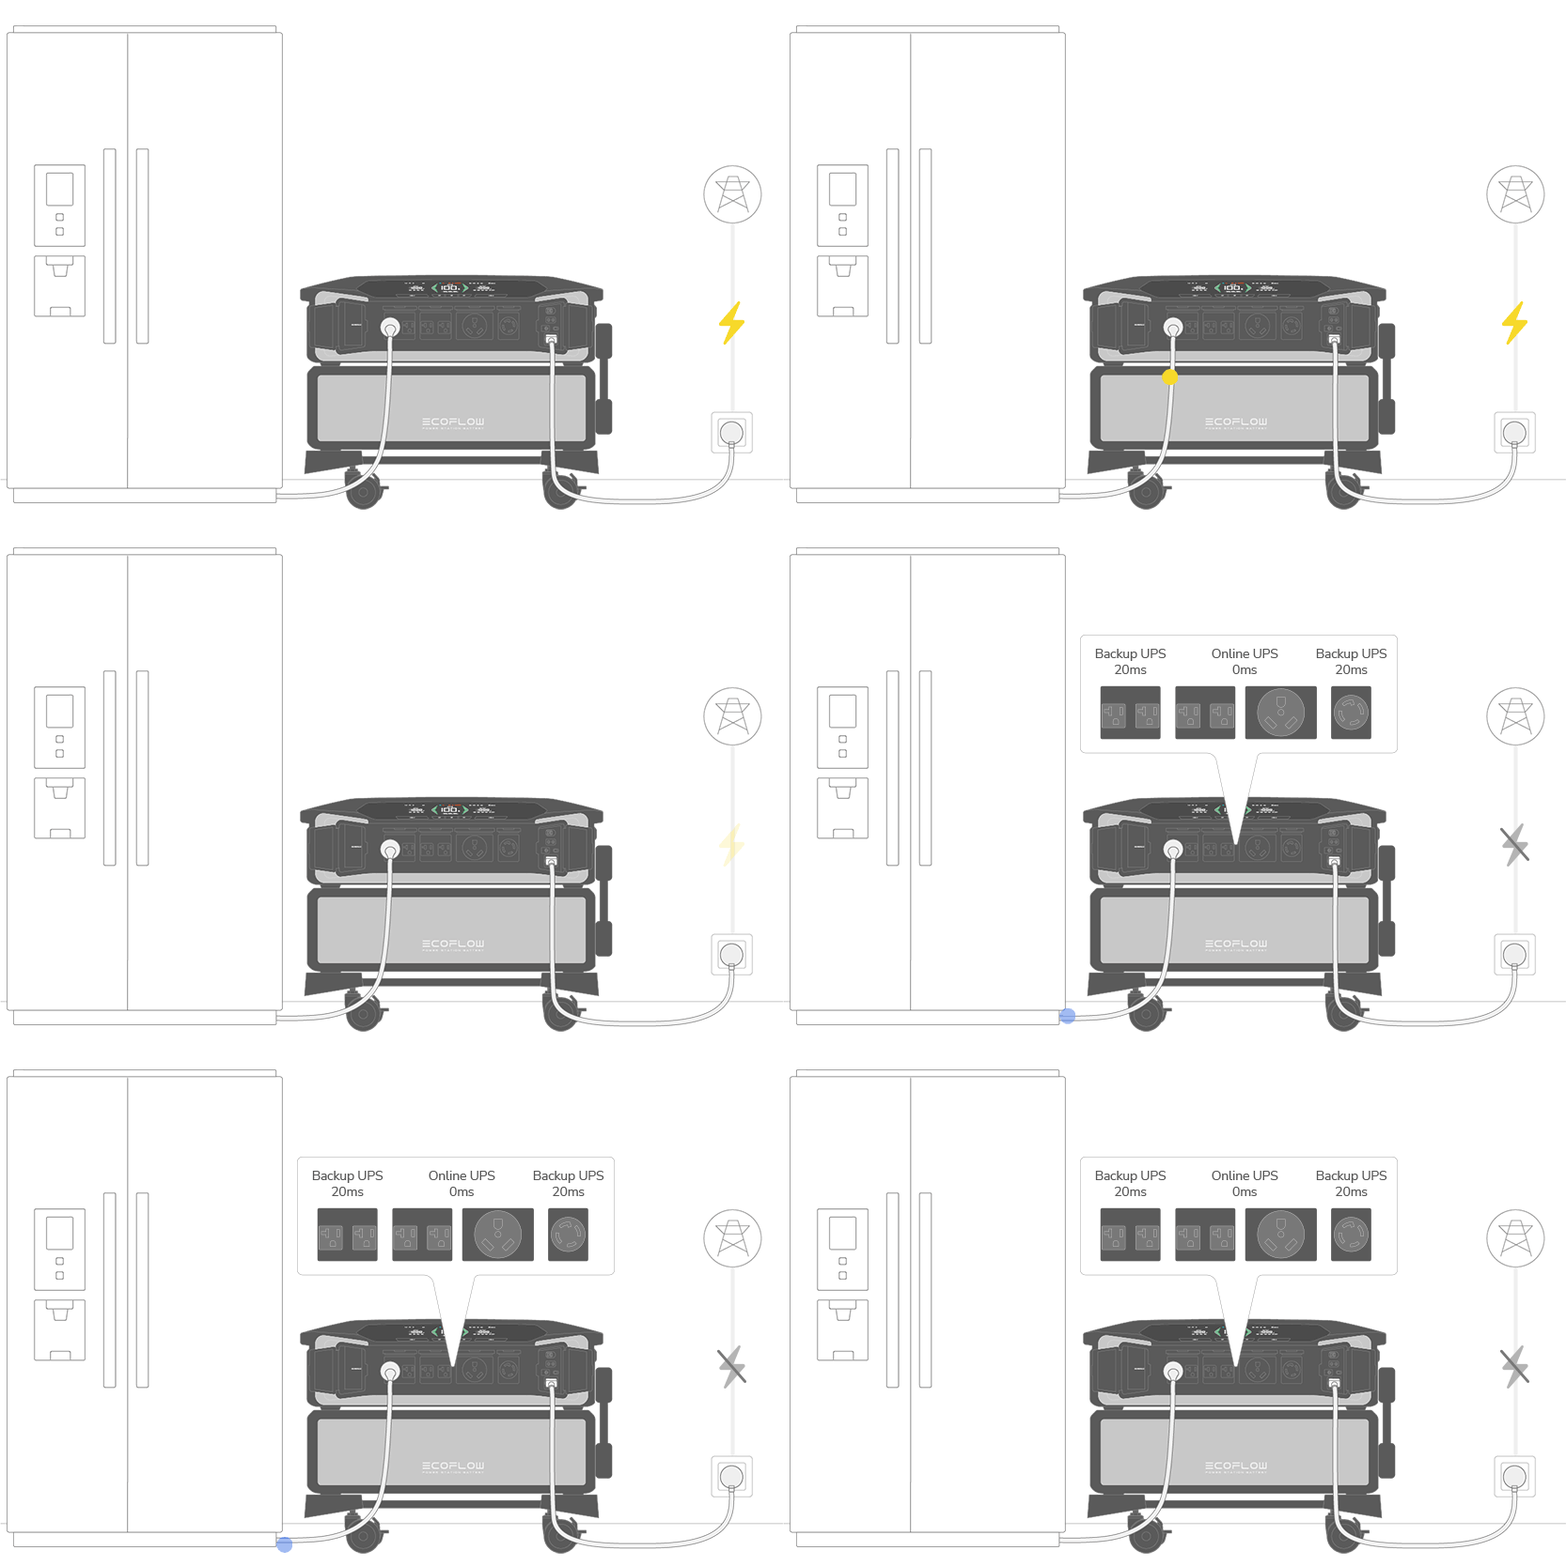
UPS (Uninterruptible Power Supply) is a device or a system that provides continual power supply and protects your appliances from damage if the incoming power is interrupted.
DELTA Pro Ultra supports two types of UPS: online UPS and backup UPS. Connect the device to a wall outlet (see "Charging from the wall outlet") using the supplied AC charging cable and to your appliances at the same time, your appliances will receive power from the grid but not from the product. Once there is a power outage, the device will automatically power up your appliances with the stored power; if your appliances require 0 ms switching, we recommend that you connect your appliances to AC output sockets (online UPS) for uninterrupted power supply.
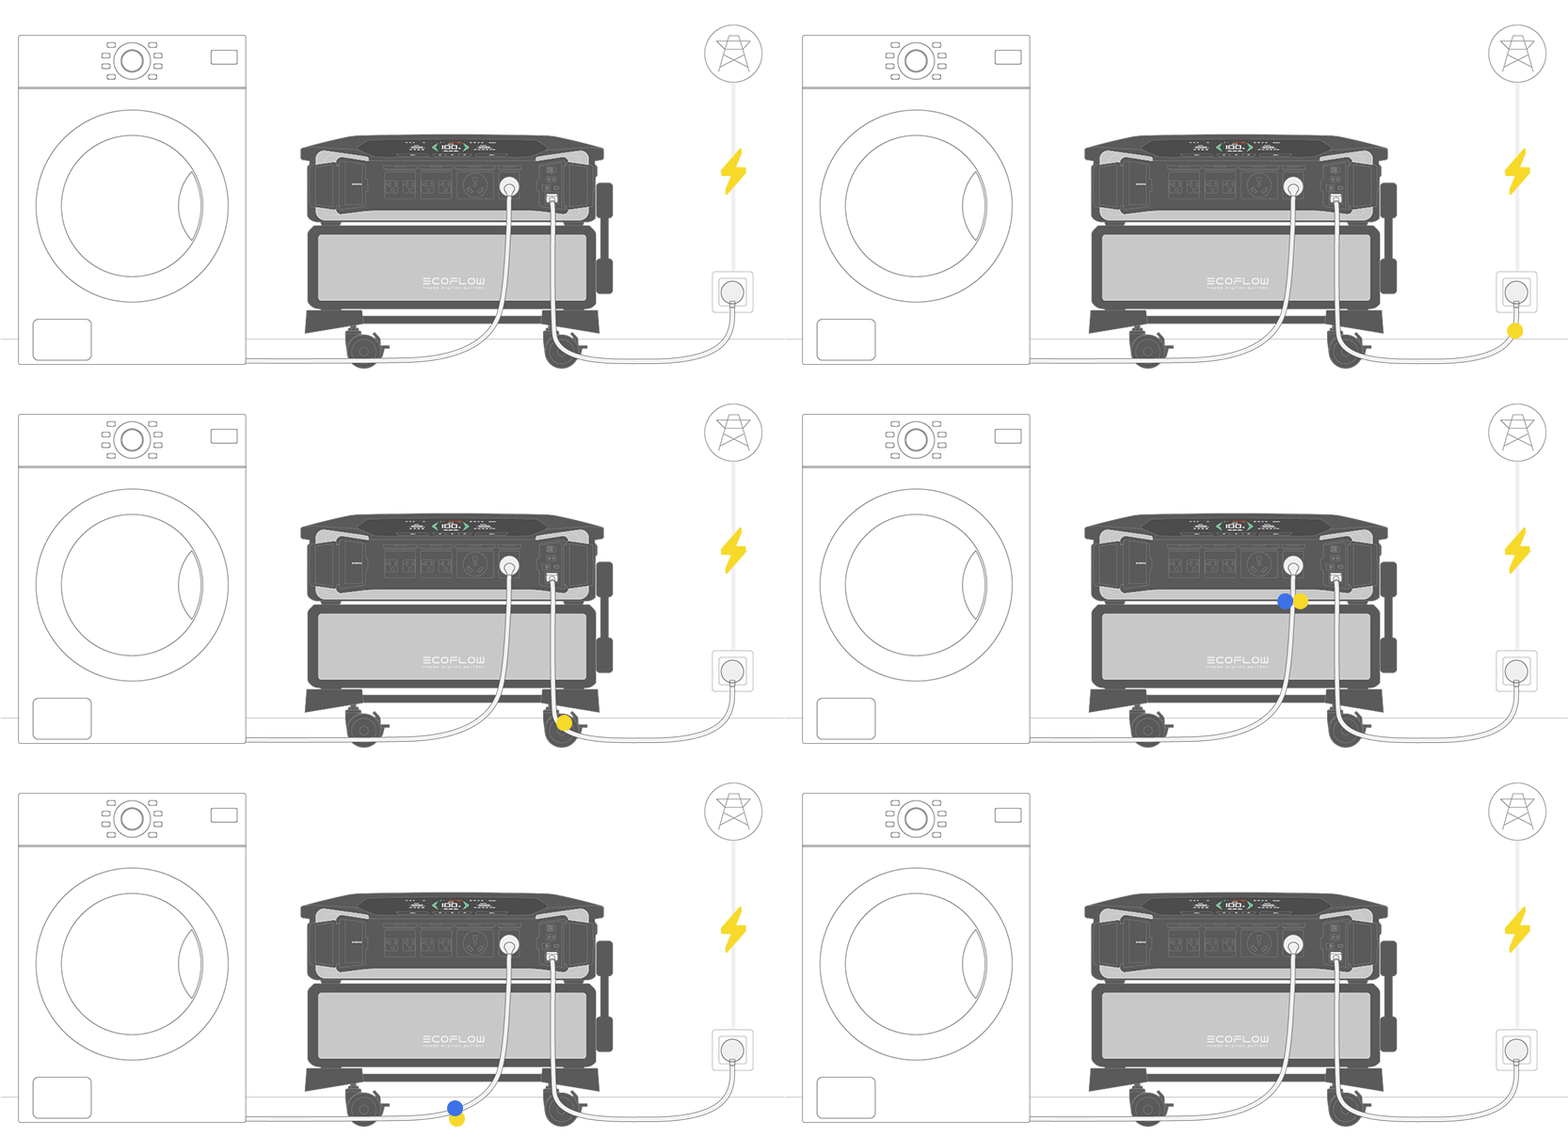
X-Fusion is an advanced technology that ensures all AC output sockets provide optimal output when the product is in bypass mode (when you recharge and discharge the device simultaneously, the device enables bypass mode automatically), in terms of wattage and amp. In the fast charging mode, the output will always be 7.2kW no matter how much the input is.

The EcoFlow app provides an all-in-one experience for you to control, monitor, or customize your EcoFlow DELTA Pro Ultra from afar. To get started, you can download the EcoFlow app at the top of this page or search "EcoFlow" in App Store or Google Play Store.
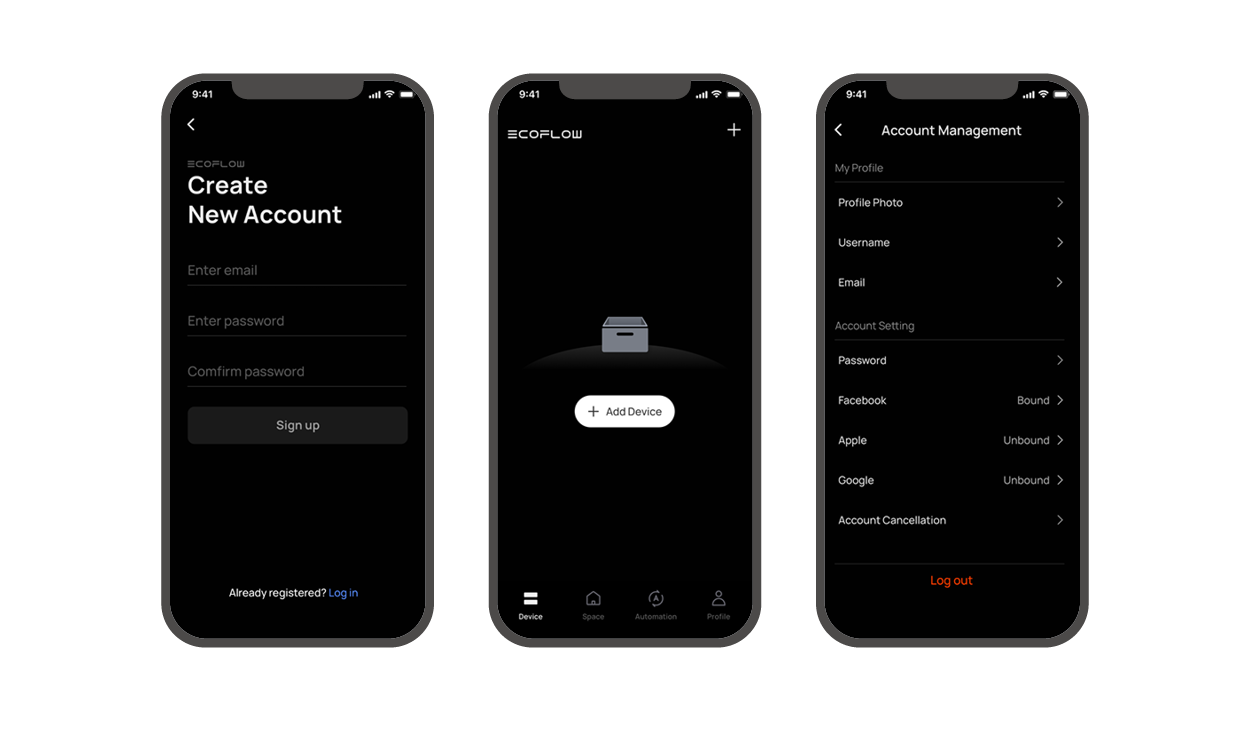
After registration, you will be notified by the app to "add" the device. If you can't receive this pop-up notice, then please add the device manually. To add the device manually, please follow steps below:
- Click "Add" or the plus sign in the upper right corner.
- Wait for the app to scan the available device and then click the product icon.
There are few ways to connect to DELTA Pro Ultra: Bluetooth, IoT and 4G.
- Bluetooth: Generally, you are notified to turn on Bluetooth when you bond the app with the device. Once the Bluetooth connection has been established between the app and the device, you can check the device's operating status and control/manage the device wirelessly via the app.
- IoT: After connecting to Bluetooth, select the icon next to Bluetooth and enter the correct password. Once connected, the device will switch to loT mode.
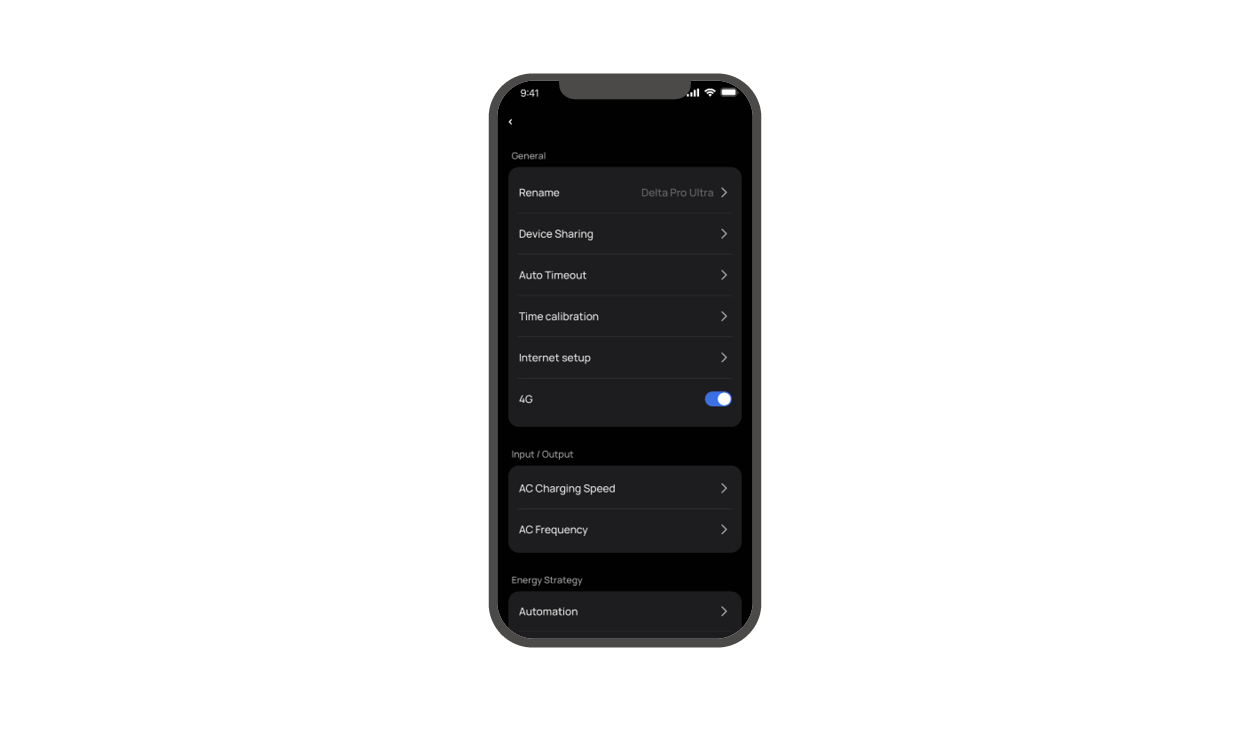
Rename
The default name for the product is its SN number. You can modify the product name in the general setting.
Device sharing
Enter the person's e-mail and wait for them to accept the invitation, then you'll be able to co-configure the device.
Timeout
There are four types of timeout: unit timeout (default time: 24 hours), screen timeout (default time: 5 minutes), AC timeout (default time: 12 hours), 12V DC timeout (default time: 12 hours)
- Unit timeout: if the device is not operating or has no load, it will automatically turn off once the preset timeout duration has lapsed.
- Screen timeout: If the device is under no operation, the screen will automatically shut off once the preset timeout duration has lapsed.
- AC timeout: If AC output is not operating or has no load, the AC power button will automatically shut off once the preset timeout duration has lapsed.
- 12V DC timeout: If DC output is not operating or has no load, the DC output button will automatically shut off once the preset timeout duration has lapsed.
Timezone
You can either allow the app to automatically track your time zone or manually select it.
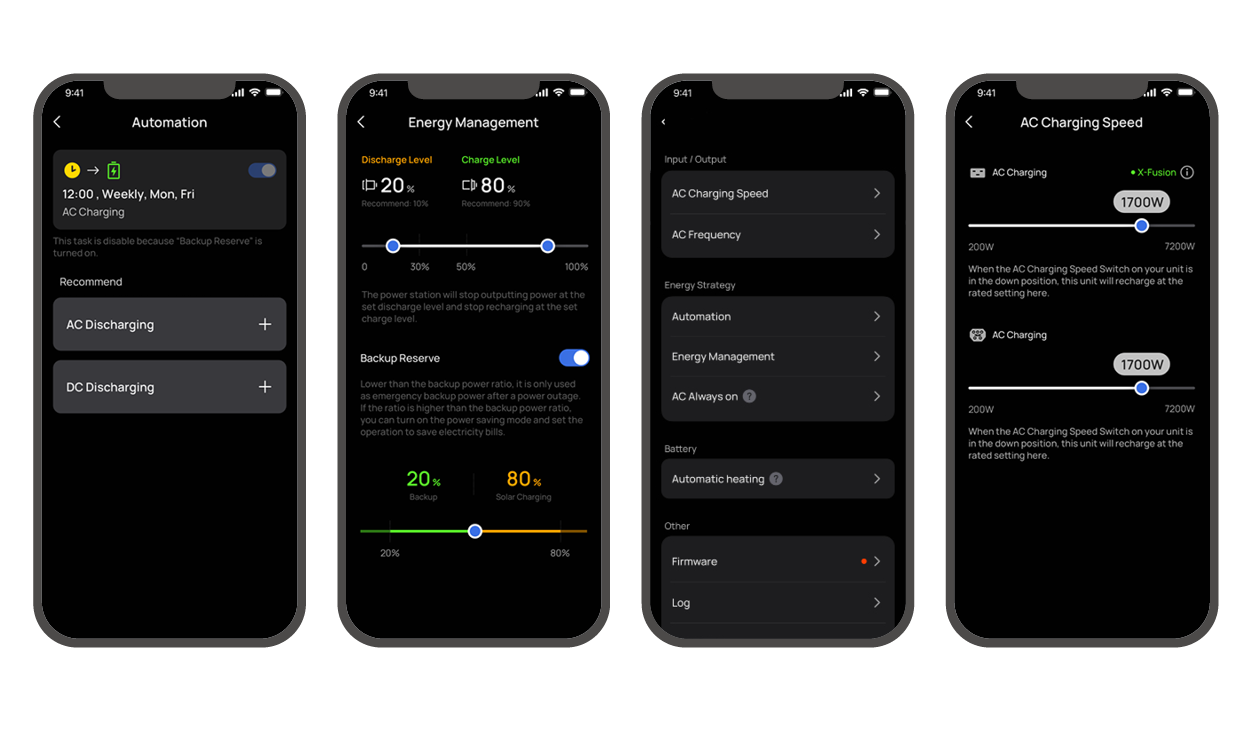
Input Settings
In the input setting, you can adjust the charging speed of both the AC charging input port and power input/output port.
For AC charging, please remember to flick the "AC charging speed switch" to the right, check "AC Charging" in this online manual for details.)
Energy strategy
Automation (timer)
You can set a time or a period of time to charge or discharge DELTA Pro Ultra.
The following modes are currently available: AC charging, AC discharging, and DC discharging.
Energy management
-
Charging/Discharging level
You can set the charging and discharging level in energy management, the charging level range is 50%-100% and the discharging level is 0%-30%. Once settings are done, the device will stop charging or discharging at the preset levels.
You can set the charging and discharging level on this page, with a range of 0-30% for discharging level and 50-100% for charging level according to your preference. After the setting, the device will stop charging or discharging at the preset levels. After the levels are set, the icon of Charging/discharging level will show up in the upper right corner of the LCD screen. -
Backup Reserve
You can enable the backup reserve feature by tapping the enabling/disabling button on the right. A higher backup reserve level will allow you to have a larger power reserve during power outages, whereas a lower backup reserve level will allow you to make better use of solar power.
When the battery level is higher than the backup reserve level, DELTA Pro Ultra will be powered through solar charging and the AC input will be disabled; when the battery is lower than the backup reserve level, the device will start charging from AC charging.
Battery setting
You can set the battery to self-heat automatically by enabling the "battery preconditioning" in the battery setting.
Charging heating
Charging heating is automatically activated when ambient temperature is below 0°C (32°F) and the battery will be in charging mode. The activation sequence is as follows:
- Charging heating requires charging input ≥ 250 W. When the battery internal temperature rises above 5°C (41°F), the battery will start heating as well as charging process.
- When the battery internal temperature rises above 10°C (50°F), charging heating stops, and battery charging continues.
- The charging heating function works in a temperature range of -20°C~0°C (-4°F~32°F).
Discharging heating
The capacity of the battery can be significantly reduced when discharging at high power at low temperatures. In the following ambient temperature conditions, the discharging heating feature will automatically start when the battery is discharging. The details are as follows.
- When the temperature is below -10℃ (14°F) and the remaining battery percentage is above 80%, the discharging heating will automatically turn off.
- When the temperature is below -5℃ (23°F) and the remaining battery percentage is below 80% and above 60%, the discharging heating feature will automatically turn off.
- When the temperature is below 0℃ (32°F) and the remaining battery percentage is below 60% and above 30%, the discharging heating feature will automatically turn off.
- If the battery level is less than 30%, the discharging heating feature will not turn off automatically.

Both error code and error report icons usually show up together when there is any product fault, the error code icon shows a number and the error report icon starts blinking.
| Error code | Error description | Cause | Suggestion |
|---|---|---|---|
| 66 | Communciation failure with EcoFlow Smart Home Panel 2 | Internal communication failure | Contact after-sales service if a forced shutdown doesn’t work |
| 94 | Communication failure | The EV charger hasn’t received data from DELTA Pro Ultra after 5 seconds | - Plug in the EV X-Stream adapter again - Please contact after-sales service if the problem persists |
| 103 | DC output port overcurrent | DC output port short-circuit or overload. | - Check if the DC output port is short-circuited or check the spec of the load connected to the port (12.6V/30A). - Re-enable the DC output. - Contact the after-sales service if a forced shutdown doesn't work. |
| 171 | Low-PV input overvoltage | The supply voltage of connected solar panels is too high | Ensure that solar panels are in good condition |
| 177 | Weak sunlight protection for Low-PV input | The connected solar panel(s) has/have insufficient power | When there is sufficient sunlight, re-connect the solar panels |
| 274 | AC charging input port overcurrent | Power of loads higher than specifications | Lower the output load and plug in the AC charging cable again |
| 297 | L2 bypass overload | Power of loads higher than specifications | Lower the output load and plug in the AC charging cable again |
| 402~408 | AC output socket 1-7 overload | AC output socket overload | Ensure the loads connected to the ports meet the specs |
| 433 | Current overload | Overcurrent at the output port of the EcoFlow 50 Amp Hub | Replace with loads of lower power or reduce the number of loads |
| 457 | Weak sunlight failure | Insufficient sunlight | - Ensure that solar panels are in good condition and there is sufficient sunlight - Plug solar panels in the high-PV input port again or reboot the device |
| 509 | High discharging temperature | The battery temperature is too high | Charging can be resumed automatically after the battery temperature cools down |
| 510 | Low discharging temperature | The battery temperature is too low | Charging can be resumed automatically after the battery temperature rises |
| 511 | High charging temperature | The battery temperature is too high | Charging can be resumed automatically after the battery temperature cools down |
| 512 | Low charging temperature | The battery temperature is too low | Charging can be resumed automatically after the battery temperature rises |
| 523 | Charging level protection | ||
| 524 | Discharging level protection |
If you encounter other error codes, please contact after-sales service for details.
Ask qualified personnel to check or maintain the product, and replace the original components with identical replacements.
Use clean and dry cloth or paper to clean dirt or stains off the ports. Do not clean the product with chemicals or corrosive materials.
For safety reasons, turn off the product before maintenance to avoid the risk of electric shock.
Check the product regularly according to the following checklist:
| Item | Method | Maintenance Interval |
|---|---|---|
| Heat dissipation | Check periodically that vents are free from obstacles and dust. | Every 3 months |
| Dirt cleaning | If there is any stain/dirt, use a dry, soft cloth to wipe it off. Please don't use any abrasives or chemical liquids to clean the product. | Every 3 months |
| System running status | 1. Check that the product is not damaged or deformed. 2. Ensure the product operates with no abnormal sound. | Every 3 months |
| Cable connection | Ensure all cables are intact and securely connected. | Every 3 months |
-
If the ambient environment is higher than 45℃ (113℉), we recommend that you stop using the battery for at least 20 hours for heat dissipation between two charging/discharging cycles.
-
After setting the charging and discharging levels, the battery will be fully charged automatically for calibration if it is not fully charged after a month or 30 cycles. After calibration, the battery will continuously work at the preset charging and discharging levels.
-
We recommend that you should use and store the battery at an ambient temperature of 20°C to 45°C. Keep the battery away from humid places (water, rain, etc), heat sources, and metals.
-
For a long-term storage, please discharge the battery every three months (firstly discharge it to 0%, then fully recharge it, and lastly discharge it to 60%); the battery will not be covered by the warranty if it is not charged or discharged for more than 6 months.
-
For battery safety and lifespan, do not store the battery at the temperature above 45℃ or below -20℃.
-
If the battery level drops below 1%, charge the battery to 60% before storing it. Storing the battery for a long time may cause serious damage and shorten the usage cycle.
-
If the battery is stored for a long period of time with significantly low battery level, it will go into deep sleep mode and must be charged and released from deep sleep mode before use again.
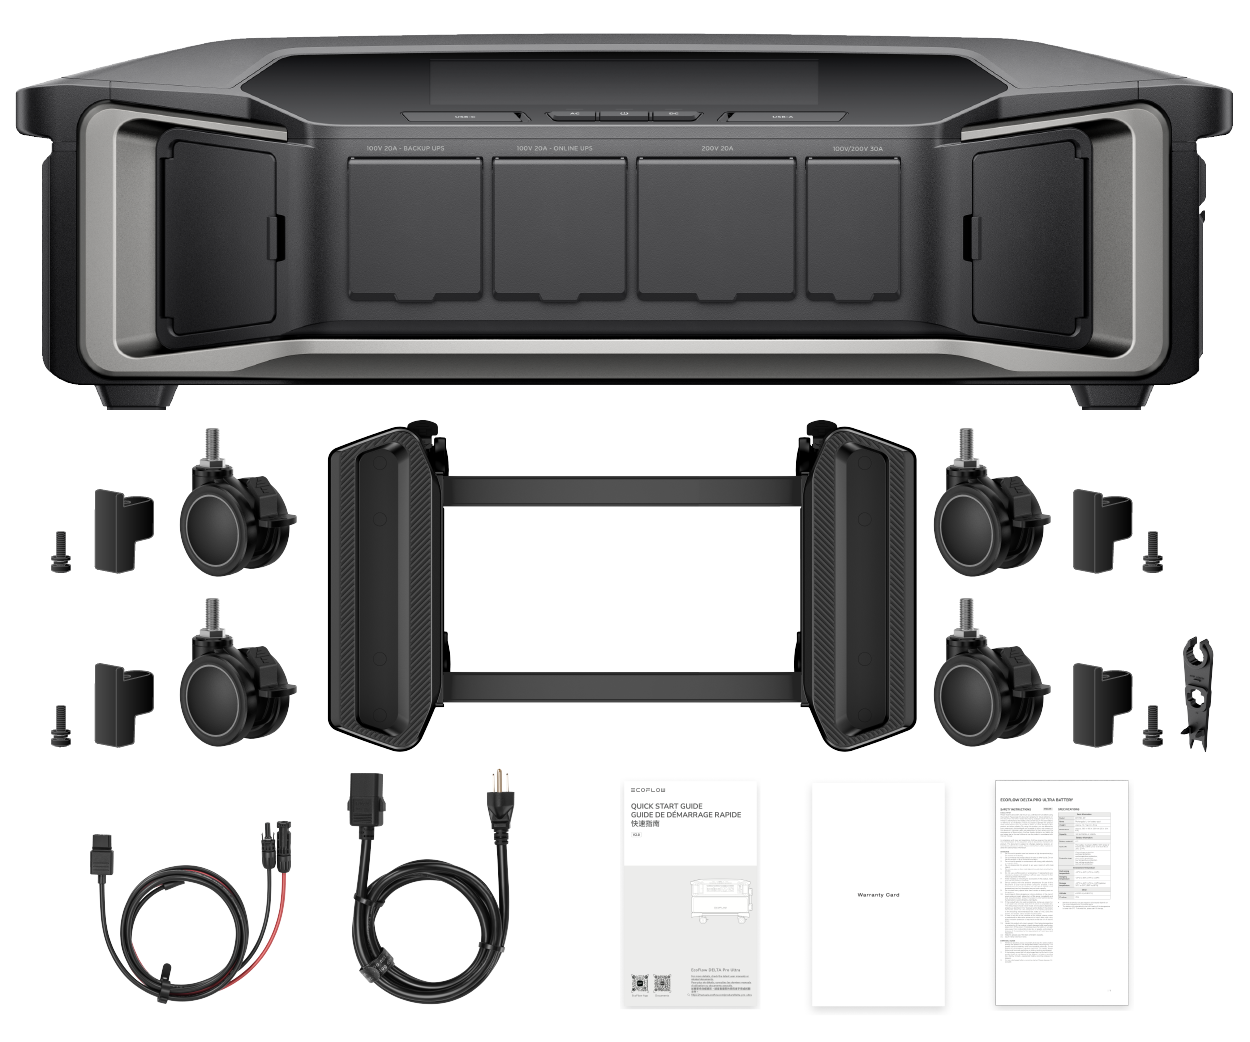
- EcoFlow DELTA Pro Ultra Inverter (×1)
- EcoFlow Portable Stand (×1)
- EcoFlow Supporting Leg (×4)
- M6*20 (×4)
- EcoFlow Side Mount Caster (×4)
- EcoFlow Disassembly and Assembly Tool (×1)
- EcoFlow Solar to Low-PV Port Charging Cable (×1)
- EcoFlow AC Charging Cable (×1)
- User Manual & Warranty Card
NOTICE
The EcoFlow DELTA Pro Ultra Inverter must be used together with at least one EcoFlow DELTA Pro Ultra Battery as a whole set.
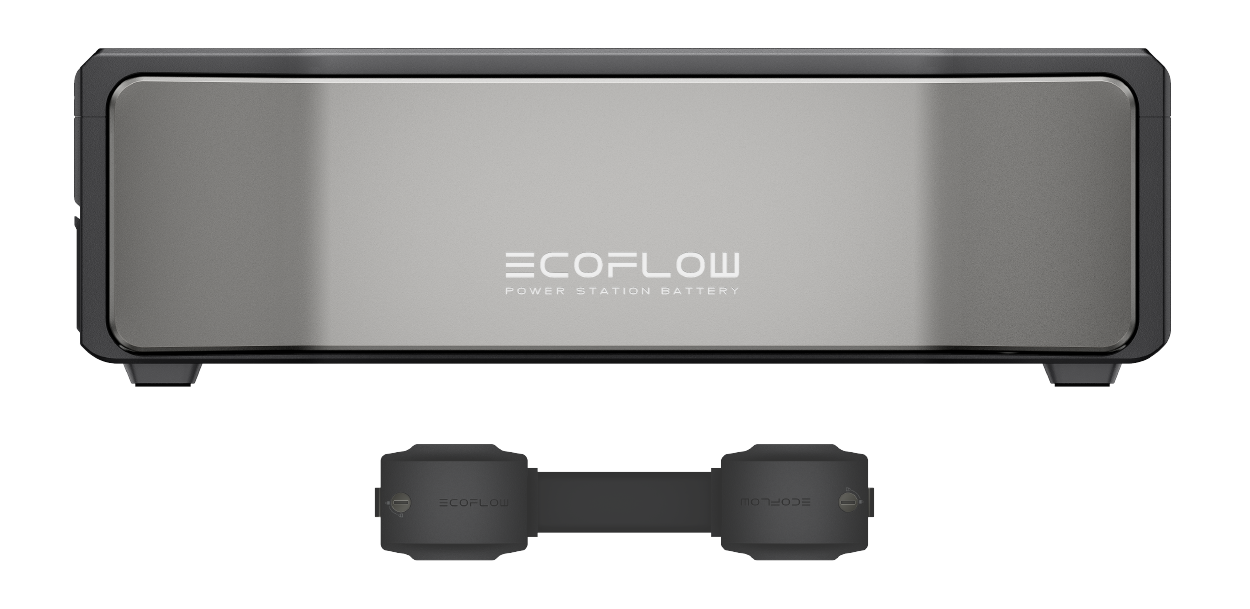
1 EcoFlow DELTA Pro Ultra Battery
2 EcoFlow Battery Connection Cable

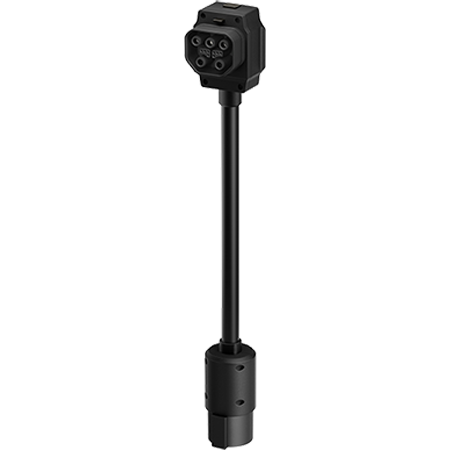
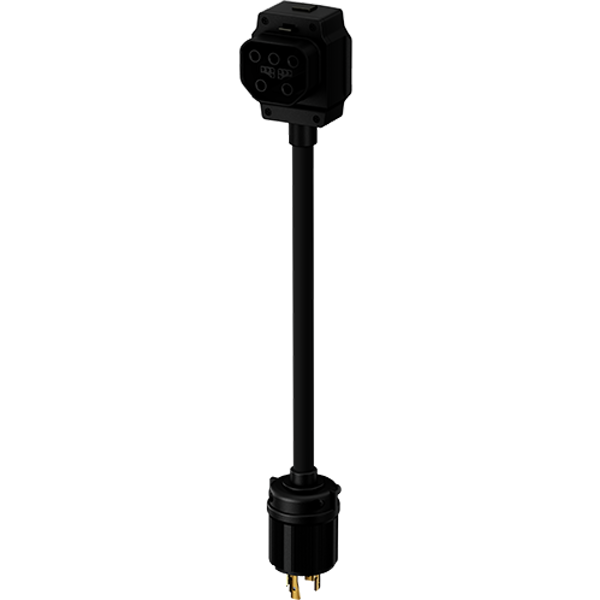
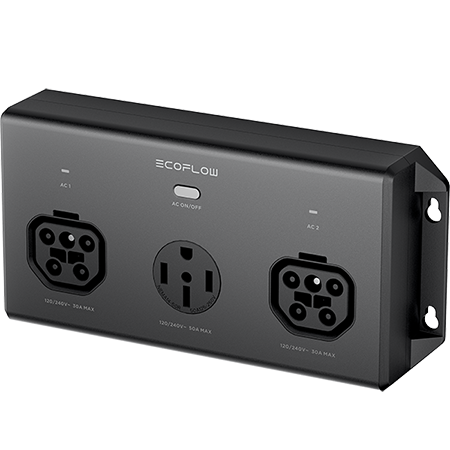
-0.75m_3.png)
These are safety warning symbols. Such safety information alerts you to hazards that can be lethal to you and others, and that can cause damage to the equipment. All safety information is preceded by safety warning symbols and hazard words, including: "DANGER", "WARNING", "CAUTION", and "NOTICE". The "DANGER", "WARNING", "CAUTION", and "NOTICE" statements in this manual do not cover all the safety instructions. They are only supplements to safety instructions.
Very high risk. If not avoided, it could lead to severe injury or even death.
Moderate risk. If not avoided, it could lead to severe injury or even death.
Lower risk. If not avoided, it may result in minor or moderate injury.
Potentially hazardous. If not avoided, it could result in equipment damage, data loss, performance deterioration, or unanticipated results.
Please read this document and ensure you understand it fully before using the product. Please keep this document properly for future reference. In addition, in this document and other related documents, EcoFlow DELTA Pro Ultra is referred to as DELTA Pro Ultra, EcoFlow DELTA Pro Ultra Inverter is referred to as the inverter, and EcoFlow DELTA Pro Ultra Battery is referred to as the battery. Failure to properly operate this product could cause serious injury to yourself or others, or cause damage to this product and other property. By using this product, you are deemed to have understood, acknowledged and accepted all terms and contents of this document. Individual users are responsible for their actions and the consequences of those actions. EcoFlow hereby disclaims any liability for any losses due to the user’s failure to use the product in accordance with the document.
In compliance with laws and regulations, EcoFlow reserves the right to final interpretation of this document and all documents related to the product. This document is subject to changes (updates, revisions, or termination) without prior notice. Please visit EcoFlow’s official website to obtain the latest product information.
SAVE THESE INSTRUCTIONS – This online manual contains important instructions for model EFYJ751-PCS-US and EFYJ751-BP that shall be followed during installation and maintenance.
- Before installing, using and maintaining the product, please read carefully the safety instructions in this manual. EcoFlow is not responsible for any problems caused by improper handling of the product in installation and maintenance procedures.
- Do not use parts or accessories that are not officially supplied. Use of third-party accessories may result in risks such as fire and electric shock. If parts or accessories are necessary, please visit EcoFlow’s official sales channel for purchase information. EcoFlow is not responsible for product problems caused by the use of cables and other accessories produced by third-party manufacturers.
- Keep this product out of the reach of children and pets and close attention is required to prevent potential hazards when children or pets are close to the device.
- Strictly comply with the ambient temperature in this User Manual when using this product. If the temperature is too high, the battery may catch fire or explode. If the temperature is too low, the product may not work normally.
- Do not disassemble, modify or replace this device (including internal and external parts), if necessary, please contact qualified professionals or contact EcoFlow after-sales service for handling.
- Do not place other heavy objects (except the inverter and batteries) on the device during use or storage.
- Avoid impacts, falling, dropping or strong vibrations. In the case of severe external impact, please turn off the power immediately and stop using the product. Ensure the product is well fastened during transportation to avoid vibrations and impacts.
- If the product falls into water accidentally during use, place it in a safe open area and stay away from it until it is completely dry. The dried product should not be reused and should be disposed of properly as described in the "Disposal" section below. If the product catches fire, please use a fire extinguisher or fire-fighting equipment in the following recommended order: water or mist, sand, fire blanket, dry powder, and carbon dioxide fire extinguisher.
- Handle this product with care to prevent it from being damaged due to overturning. If the product is badly damaged after overturning, please turn off the power immediately, place the battery in an open area away from combustible materials or people, and properly dispose of it according to the requirements of local laws and regulations.
- Electromagnetic fields created by this product may affect the normal functioning of medical implants or personal medical devices, such as pacemakers, cochlear implants, hearing aids, defibrillators and so on. If you are using these medical devices, please consult the manufacturers about the restrictions on the use of relevant devices to ensure that a safe distance is maintained between this product and the implanted medical devices (such as pacemakers, cochlear implants, hearing aids, defibrillators and so on) during operation.
- When the power supply is connected in normal mode to a refrigerator, power fluctuations of the refrigerator may cause the device to automatically shut down. Therefore, when the device is connected to a refrigerator that stores medicine, vaccines or other valuable items, it is recommended to set the AC output to "Always On" in the app in order to guarantee continuous power supply, and please pay attention to the power consumption of the device.
- After the installation is completed, clean up the items in time, such as cartons, foam, plastic, cable ties, etc.
- Ensure that the device is installed in a ventilated environment, and do not block the vents when the device is in operation. Inadequate ventilation may damage the device.
- Do not use this product near heat sources or high temperatures (e.g. fire sources or hot stoves). To prolong the battery life, it is recommended to use or store this product at 20°C to 30°C.
- When installing or using the product in an environment near fumes, smoke, heat, steam or dust, it is necessary to use a protective cover to prevent the risk of fire.
- The installation environment should be hard flat ground. Due to the large mass of the device, it is necessary to ensure that the installation environment of the device is stable and that the equipment does not tilt to avoid personal injury or product damage.
- Keep the product away from humid environments, do not immerse it in water or get it wet. If the product is installed or placed near the sea or any waterways, we recommend using moisture barrier bags to prevent the product from getting soaked, otherwise, it may cause a risk of fire. If water is found inside the product, please turn off the product and stop using it again. Take anti-electric shock measures before touching the product, and put it immediately in a safe, waterproof and open area. Contact qualified personnel or EcoFlow after-sales service if necessary.
- Do not stand, lean or sit on the device.
- If the product will not be used for a long period of time, make sure that it is unplugged from the outlet and turned off.
- Do not connect this device with damaged cables. Use of damaged cables may affect the normal operation of the device or lead to potential risks.
- Do not put your hands or foreign objects into the device ports or vents.
EcoFlow DELTA Pro Ultra Inverter
If the inverter can not work anymore, dispose of it according to the local disposal requirements for electrical equipment waste. The inverter cannot be disposed of together with household waste.
- Power off the inverter before removing it, for details, check Power On/Off in the online manual.
- Sequentially disconnect the fast charging input cable, PV input cables, battery cables, and all the other modules connecting to the inverter.
- Remove the inverter and the battery from the portable stand.
- Pack and store the inverter properly.
EcoFlow DELTA Pro Ultra Battery
- If conditions permit, make sure that the battery is fully discharged before disposing it in a designated battery recycling bin. The product contains batteries with potentially dangerous chemicals, so it is strictly prohibited to dispose of it in ordinary trash cans. For more details, please follow the local laws and regulations on battery recycling and disposal.
- If the battery cannot be fully discharged due to a product failure, please do not dispose of the battery directly in the battery recycling box. In such case, you should contact a professional battery recycling company for further processing.
- Please dispose of over-discharged batteries that can not be recharged.
This device complies with part 15 of the FCC Rules. Operation is subject to the following two conditions:
(1) This device may not cause harmful interference, and (2) this device must accept any interference received, including interference that may cause undesired operation.
Any Changes or modifications not expressly approved by the party responsible for compliance could void the user’s authority to operate the equipment.
Note: This equipment has been tested and found to comply with the limits for a Class B digital device, pursuant to part 15 of the FCC Rules. These limits are designed to provide reasonable protection against harmful interference in a residential installation. This equipment generates uses and can radiate radio frequency energy and, if not installed and used in accordance with the instructions, may cause harmful interference to radio communications. However, there is no guarantee that interference will not occur in a particular installation. If this equipment does cause harmful interference to radio or television reception, which can be determined by turning the equipment off and on, the user is encouraged to try to correct the interference by one or more of the following measures:
- Reorient or relocate the receiving antenna.
- Increase the separation between the equipment and receiver.
- Connect the equipment into an outlet on a circuit different from that to which the receiver is connected.
- Consult the dealer or an experienced radio/TV technician for help.
- This equipment complies with FCC radiation exposure limits set forth for an uncontrolled environment.
This device complies with Industry Canada licence-exempt RSS standard(s). Operation is subject to the following two conditions:
(1) this device may not cause interference, and
(2) this device must accept any interference, including interference that may cause undesired operation of the device.
This Class B digital apparatus complies with Canadian ICES-003.
Le présent appareil est conforme aux CNR d’Industrie Canada applicables aux appareils radio exempts de licence. L’exploitation est autorisée aux deux conditions suivantes:
(1) l’appareil nedoit pas produire de brouillage, et
(2) l’utilisateur de l’appareil doit accepter tout brouillage radioélectrique subi, même si le brouillage est susceptible d’en compromettre le fonctionnement.
Cet appareil numérique de la classe B est conforme à la norme NMB-003 du Canada.


